Homemade keyboard
I got interested in making my own keyboard after seeing a few very nice examples online. There's the Brownfox, and Dave's version, and lots of examples on reddit's /r/mk community.
I decided to finish two things in one stroke and make a keyboard for my university's Creative Exploration course.
Layout
Very early on I decided I wanted a fairly minimalistic keyboard. First came some 60% and 70% layouts, which eventually evolved into a split orthogonal layout.
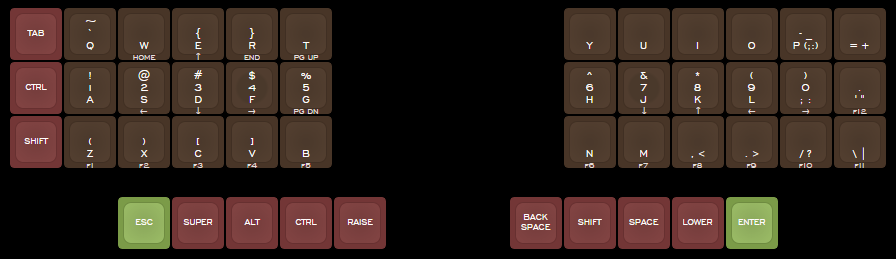
I wanted to have many functions accessible without moving my hand from the homerow, so I added a lot of buttons to the thumbs. This certainly worked, but it did take some getting used to.
Materials
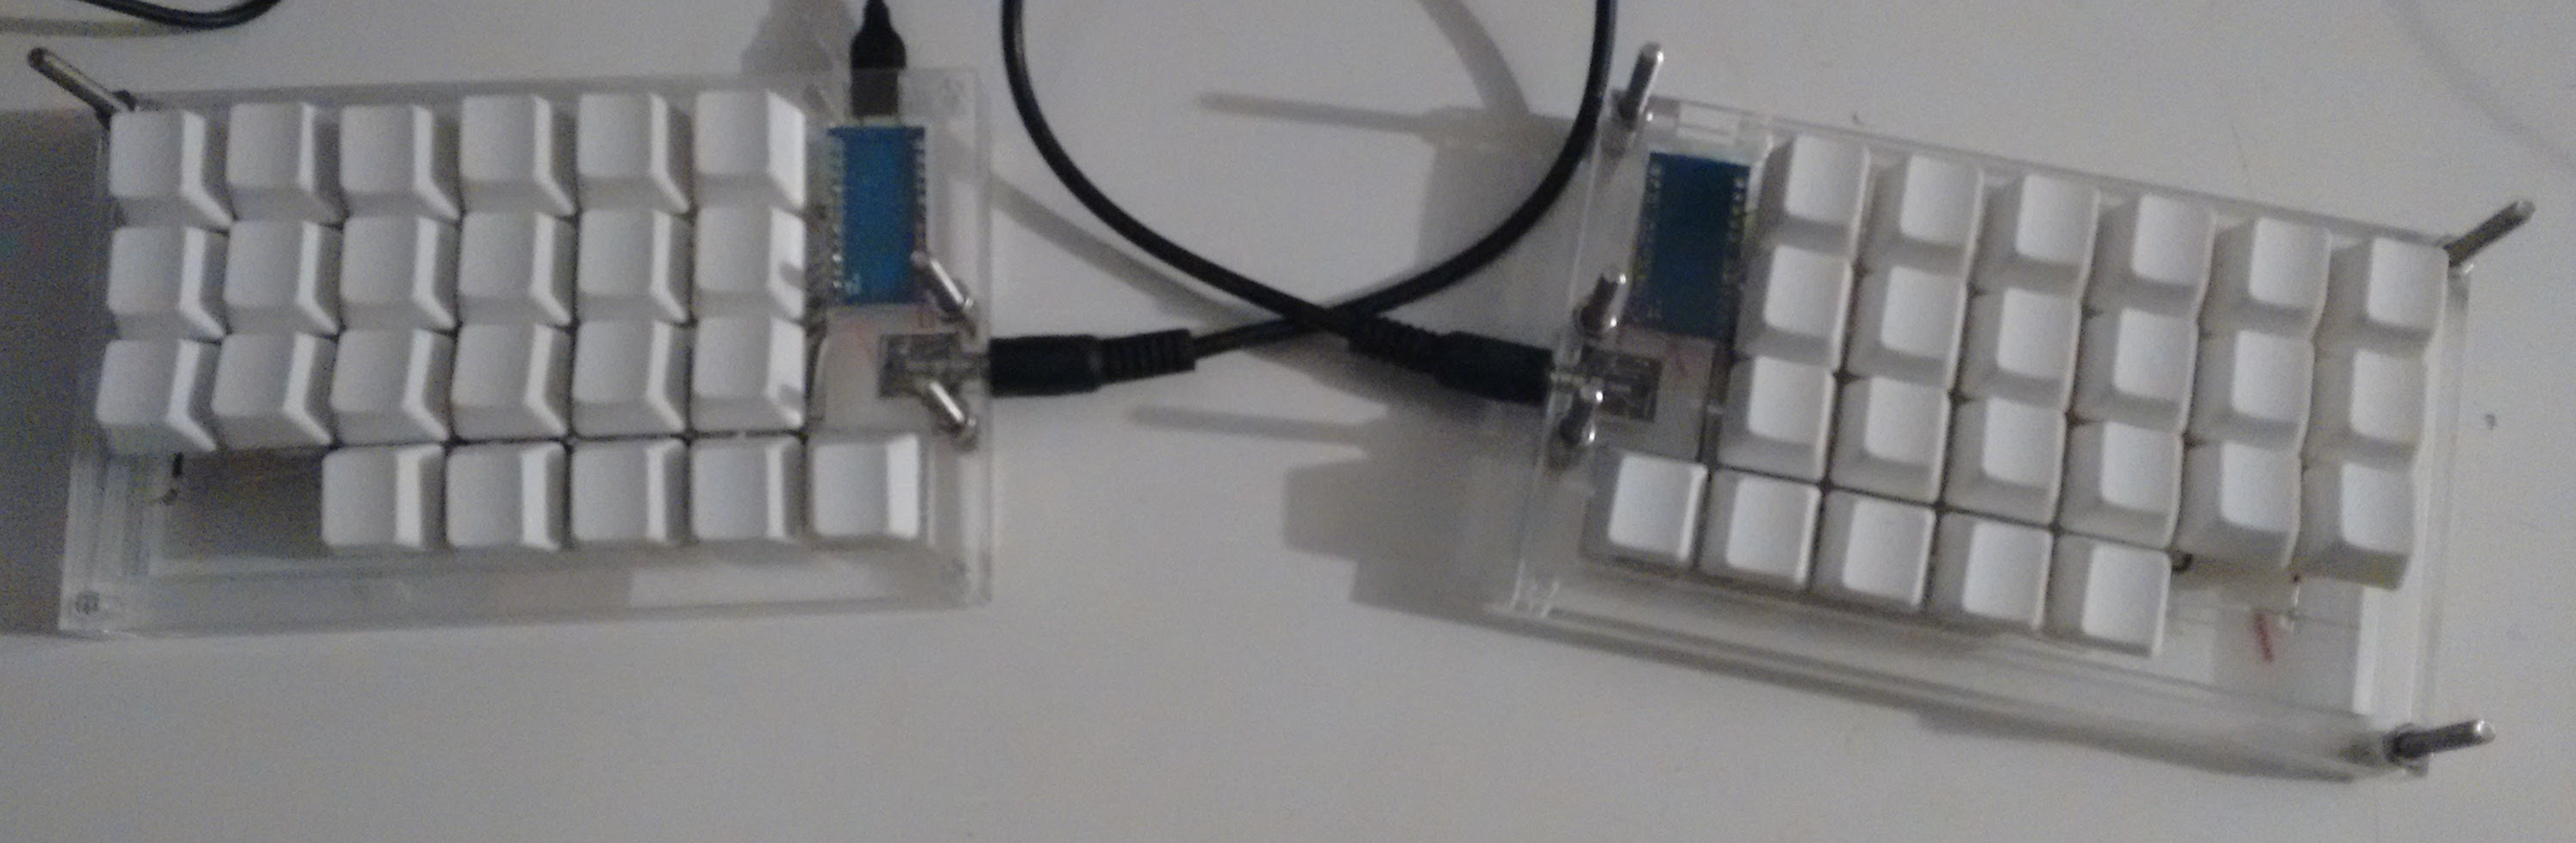
Ahtn's firmware looked to be perfect for this build, so I needed two Arduino Pro Micros and a stereo cable plus ports to connect both halves.
-
Arduino Pro Micro clones x2
€9.00
-
Stereo audio port x2 plus cable
€5.00
-
Acrylic in 1.5 and 2.0 mm
€30.00
-
Diodes x100, too many, but doesn't hurt to have extra
€2.00
-
Switches x 120, Gateron browns
€33.30
-
Keycaps x87
€15.25
-
O-rings x150
€1.97
-
Total
€96.52
Shopping around for switches resulted in finding a groupbuy for 120 Gateron brown switches for about $33. The switches need to be either mounted on a pcb or in a top plate. As I was planning to handwire the board and not use a pcb, I needed a top plate. This plate needs a very specific thickness of 1.5mm. I wanted to keep costs down by using inexpensive and laser-cuttable materials. It took a while to find a local source of 1.5mm acrylic. An advantage of this being a university project meant that I had access to lasercutting services.
Design
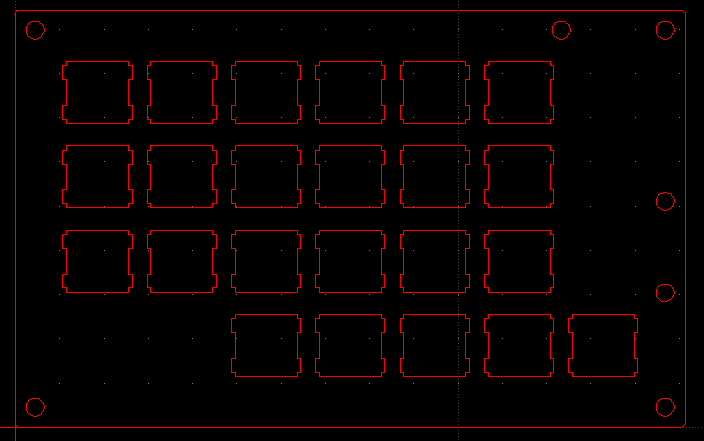
After making the final layout with the keyboard layout editor I used the useful plate and case builder to transform it into a laser-cuttable design file. I made sure to add some extra holes in the case for minor things like 'being able to plug the keyboard in' and 'connecting both halves'.
I used librecad as my design program.
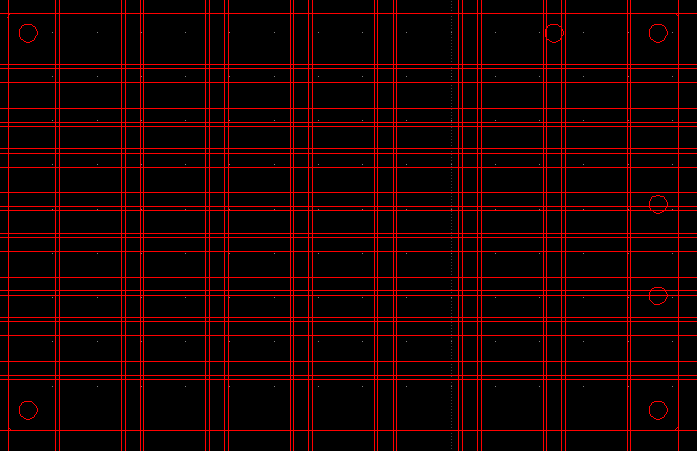
If somehow your design looks like the picture below and you can't get it back with ctrl-z, you've accidentally turned on the 'construction layer' in the layer menu.
The first cut bit of plastic had a symmetry-related mistake, and there were some other things I wanted to improve. The second cut was much better. Using the MX cutout instead of the MX+ALPS cutout held the keys more securely.
Construction
And so, construction began.
 Test fitting the parts, with overly long bolts and with the protective plastic still on the acrylic.
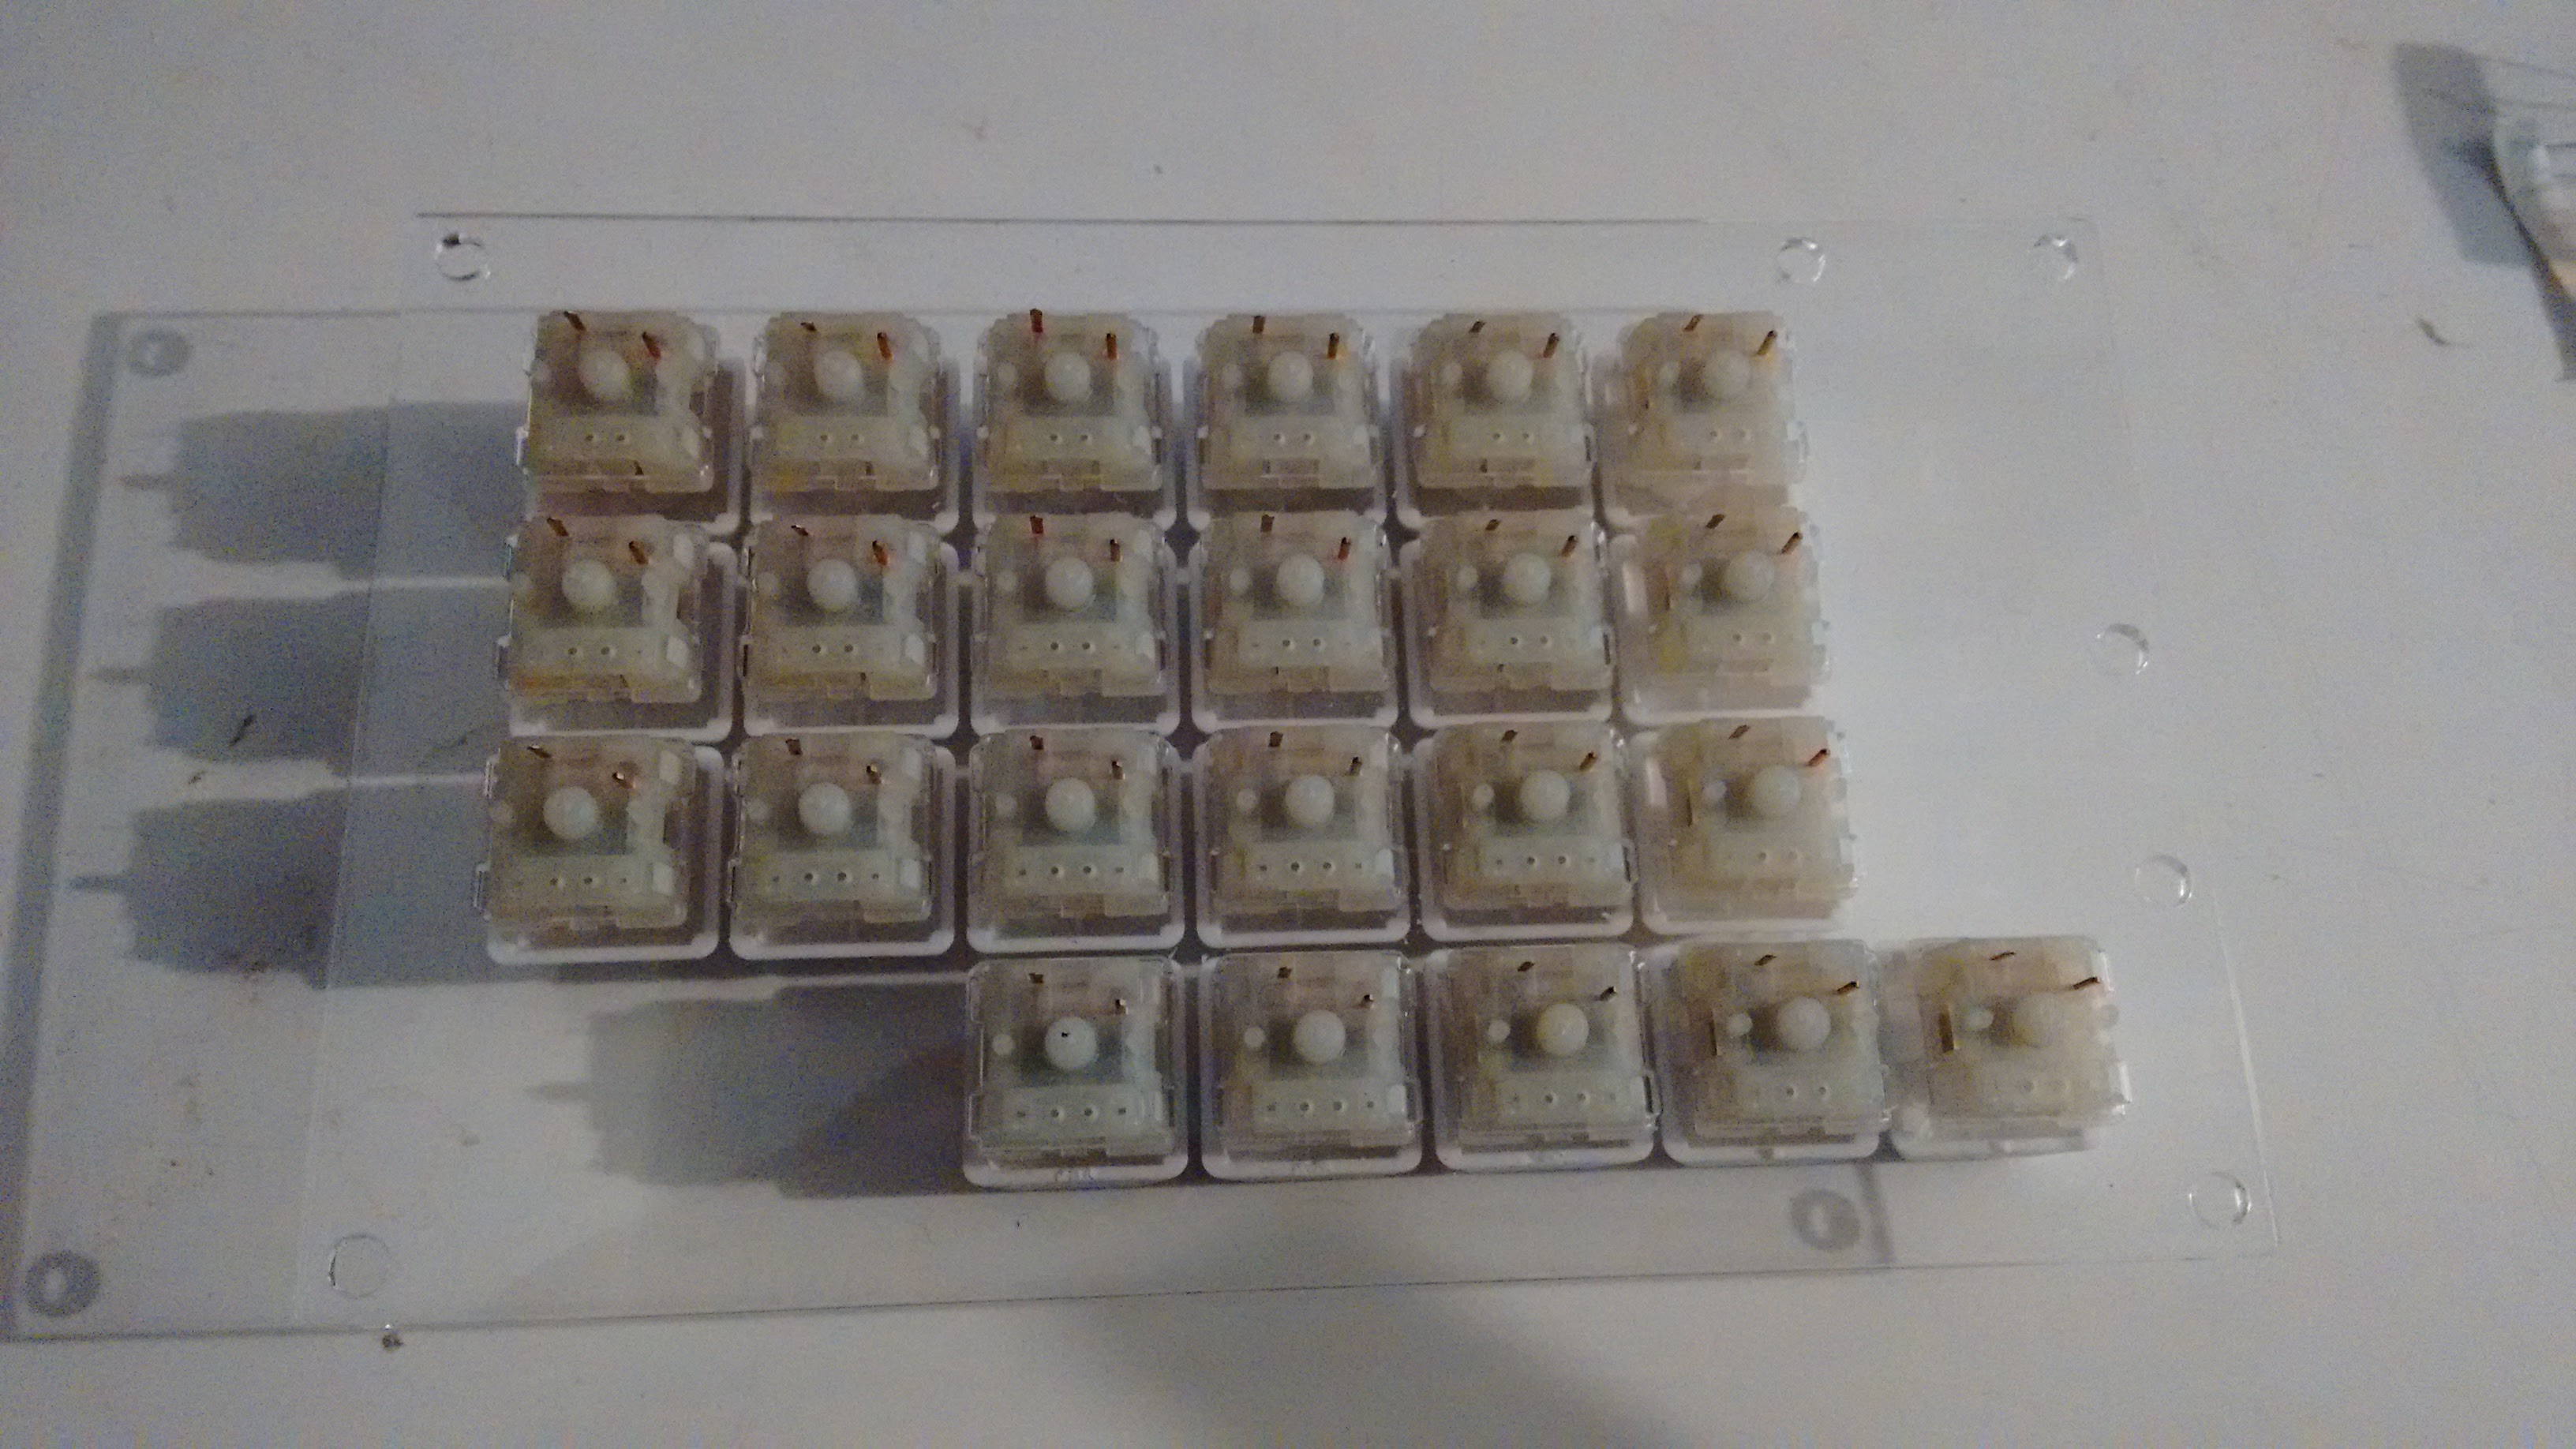 The keys all aligned and the right places.
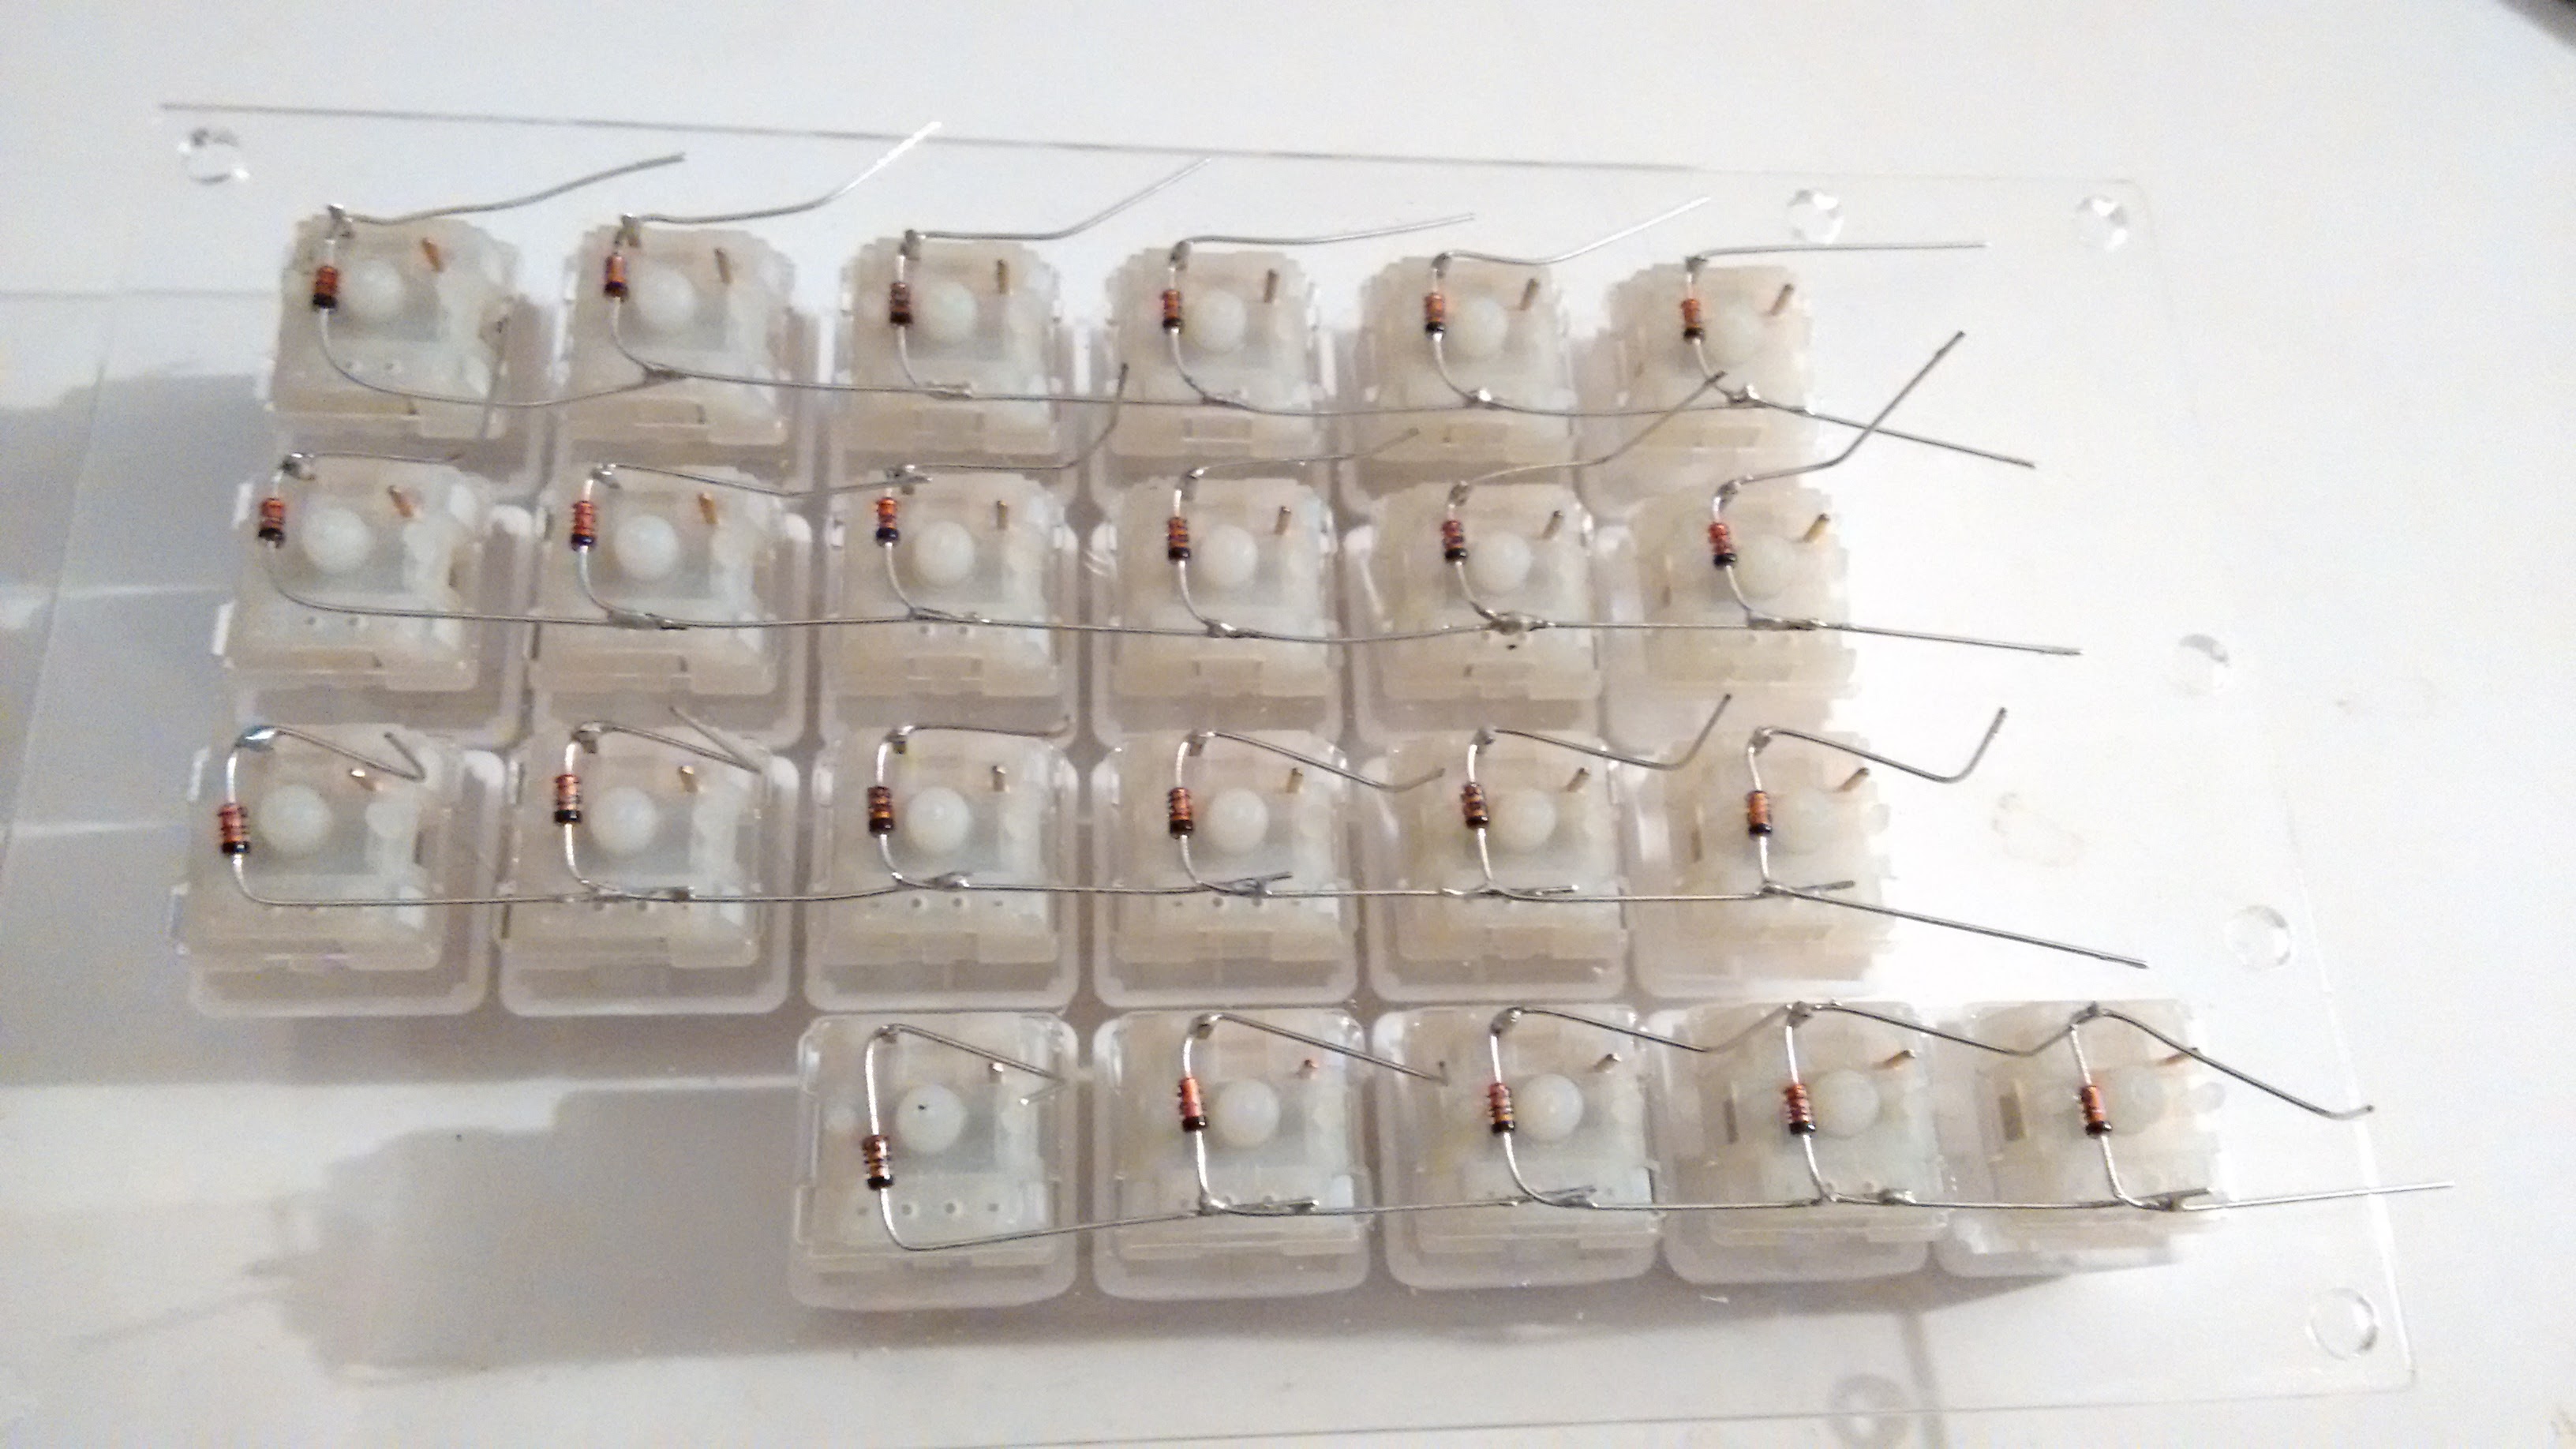 A diode connected to each key and connected in rows. This allows the software to recognize each individual key, even if you press all of them at once.
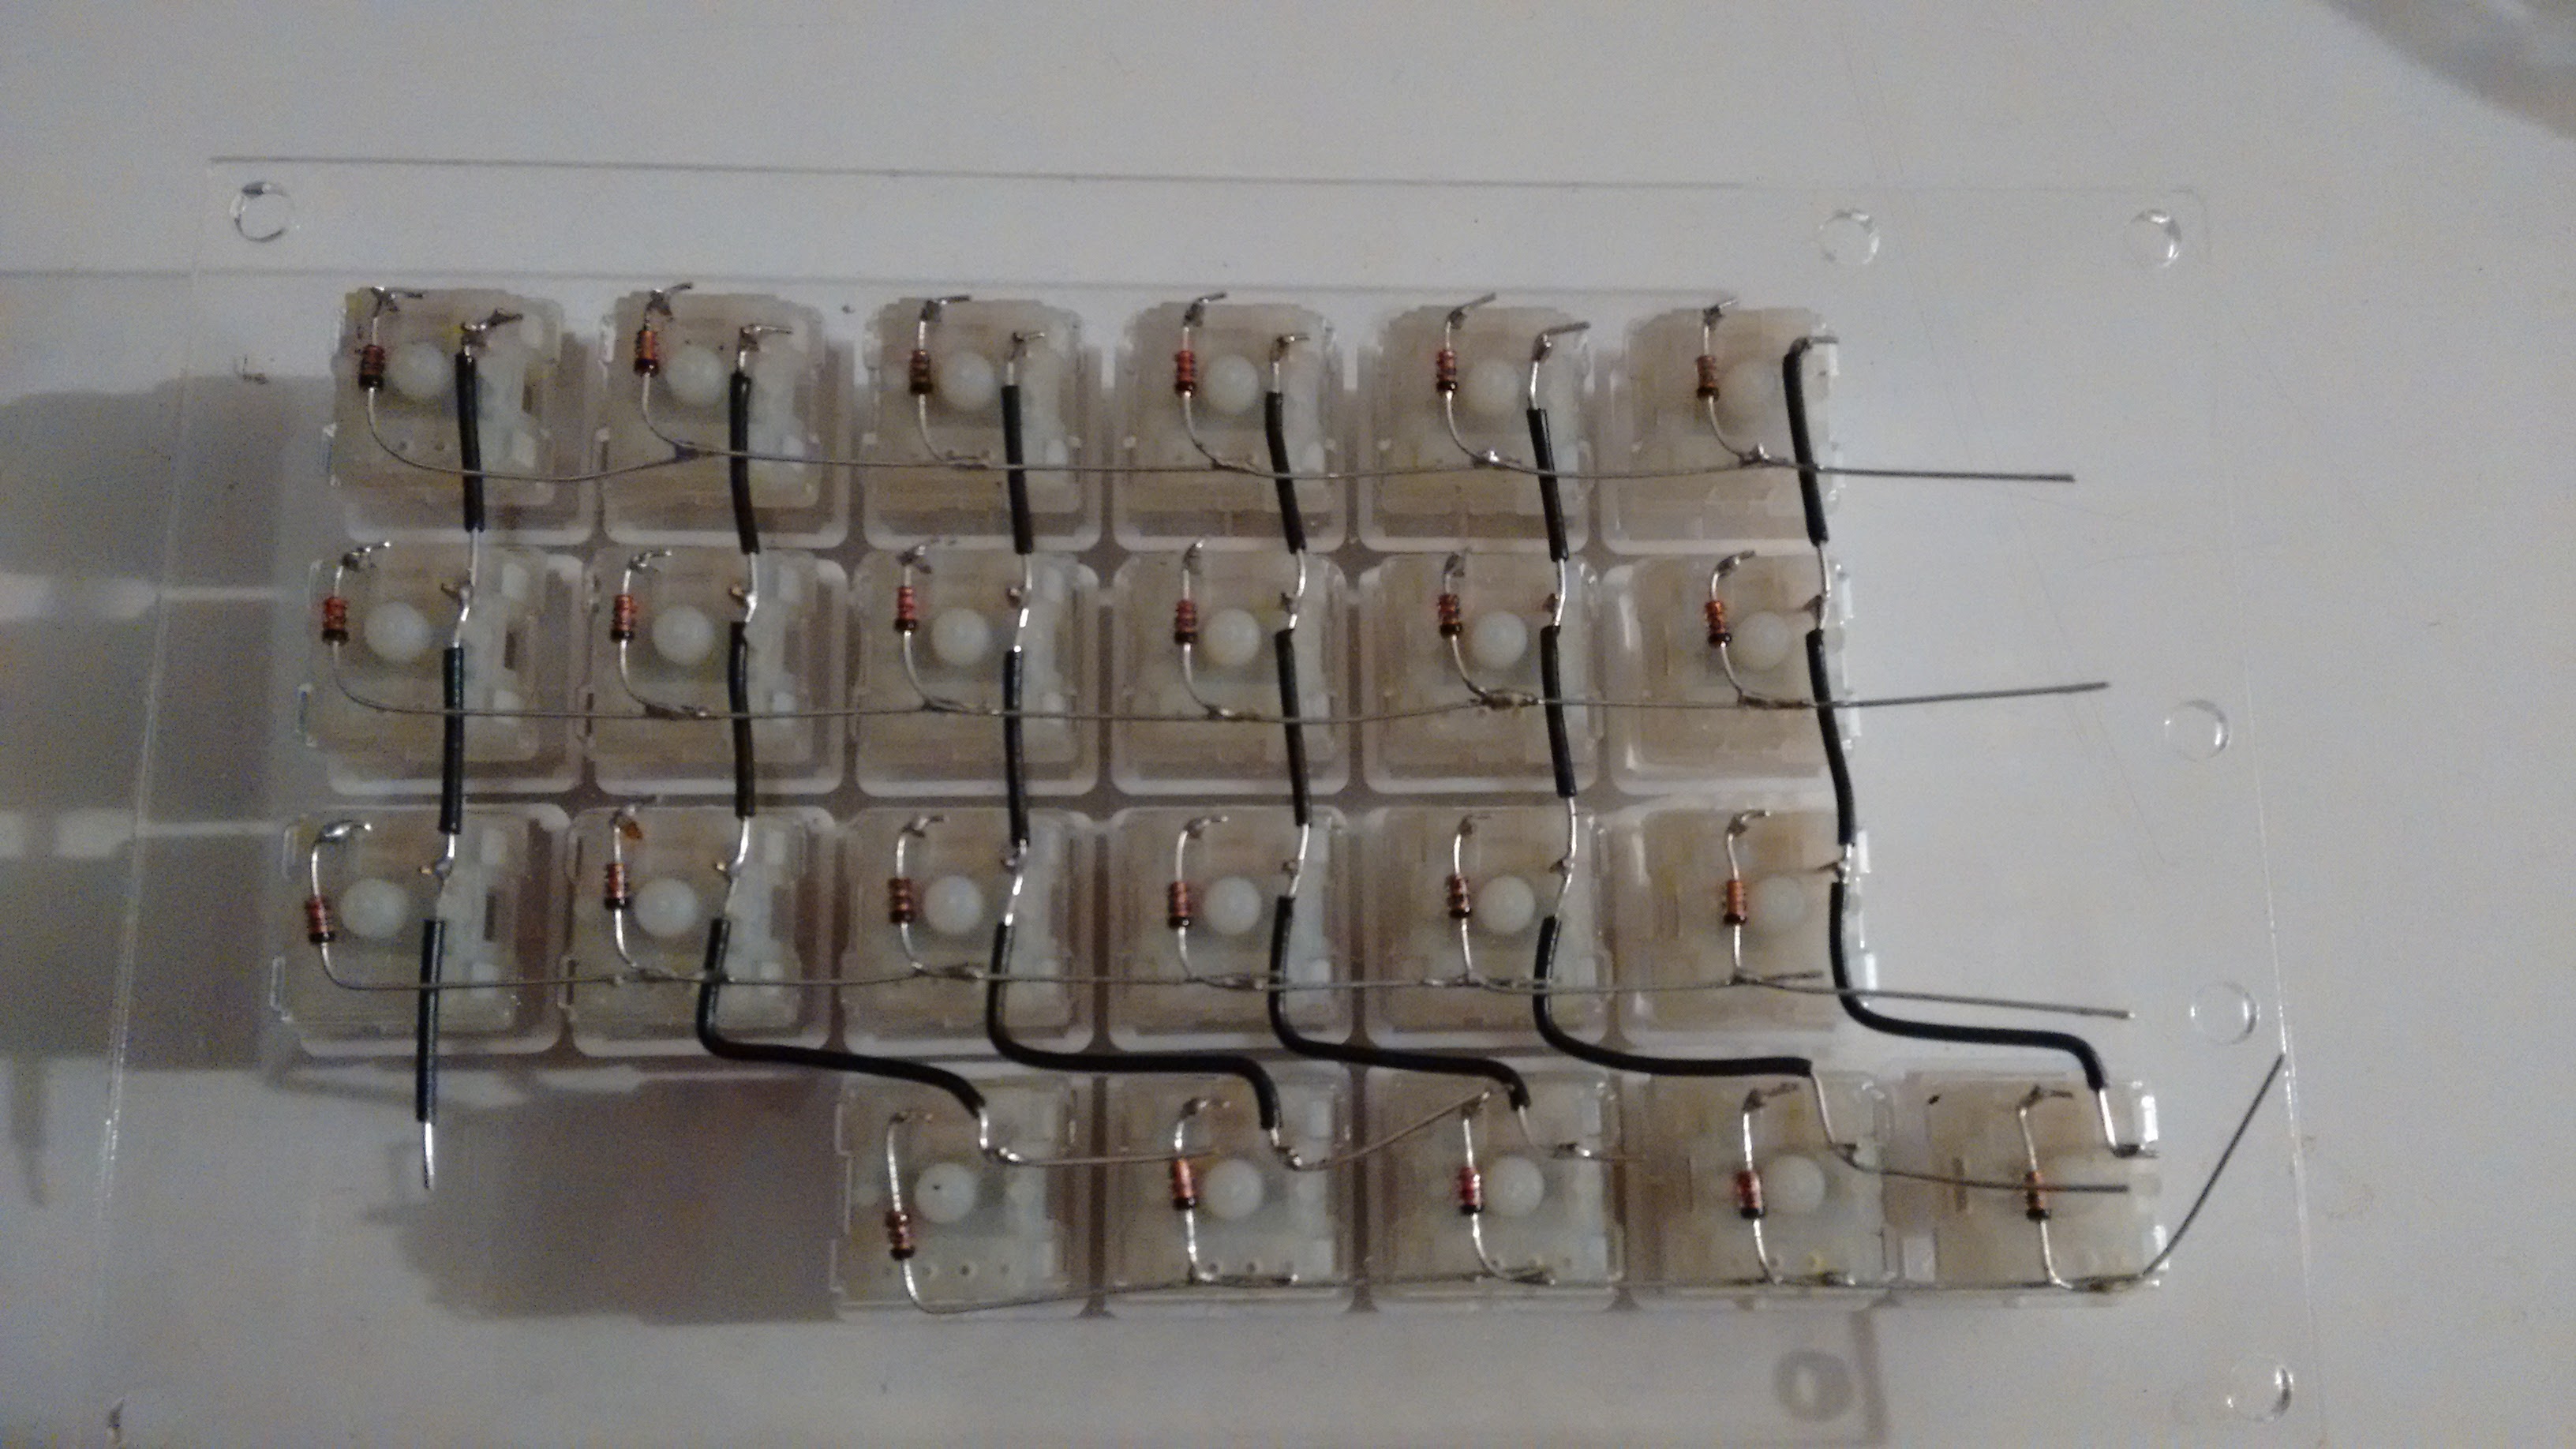 Connecting the columns. Kinda tricky to thread the insulation back on the wire, but better than short circuiting.
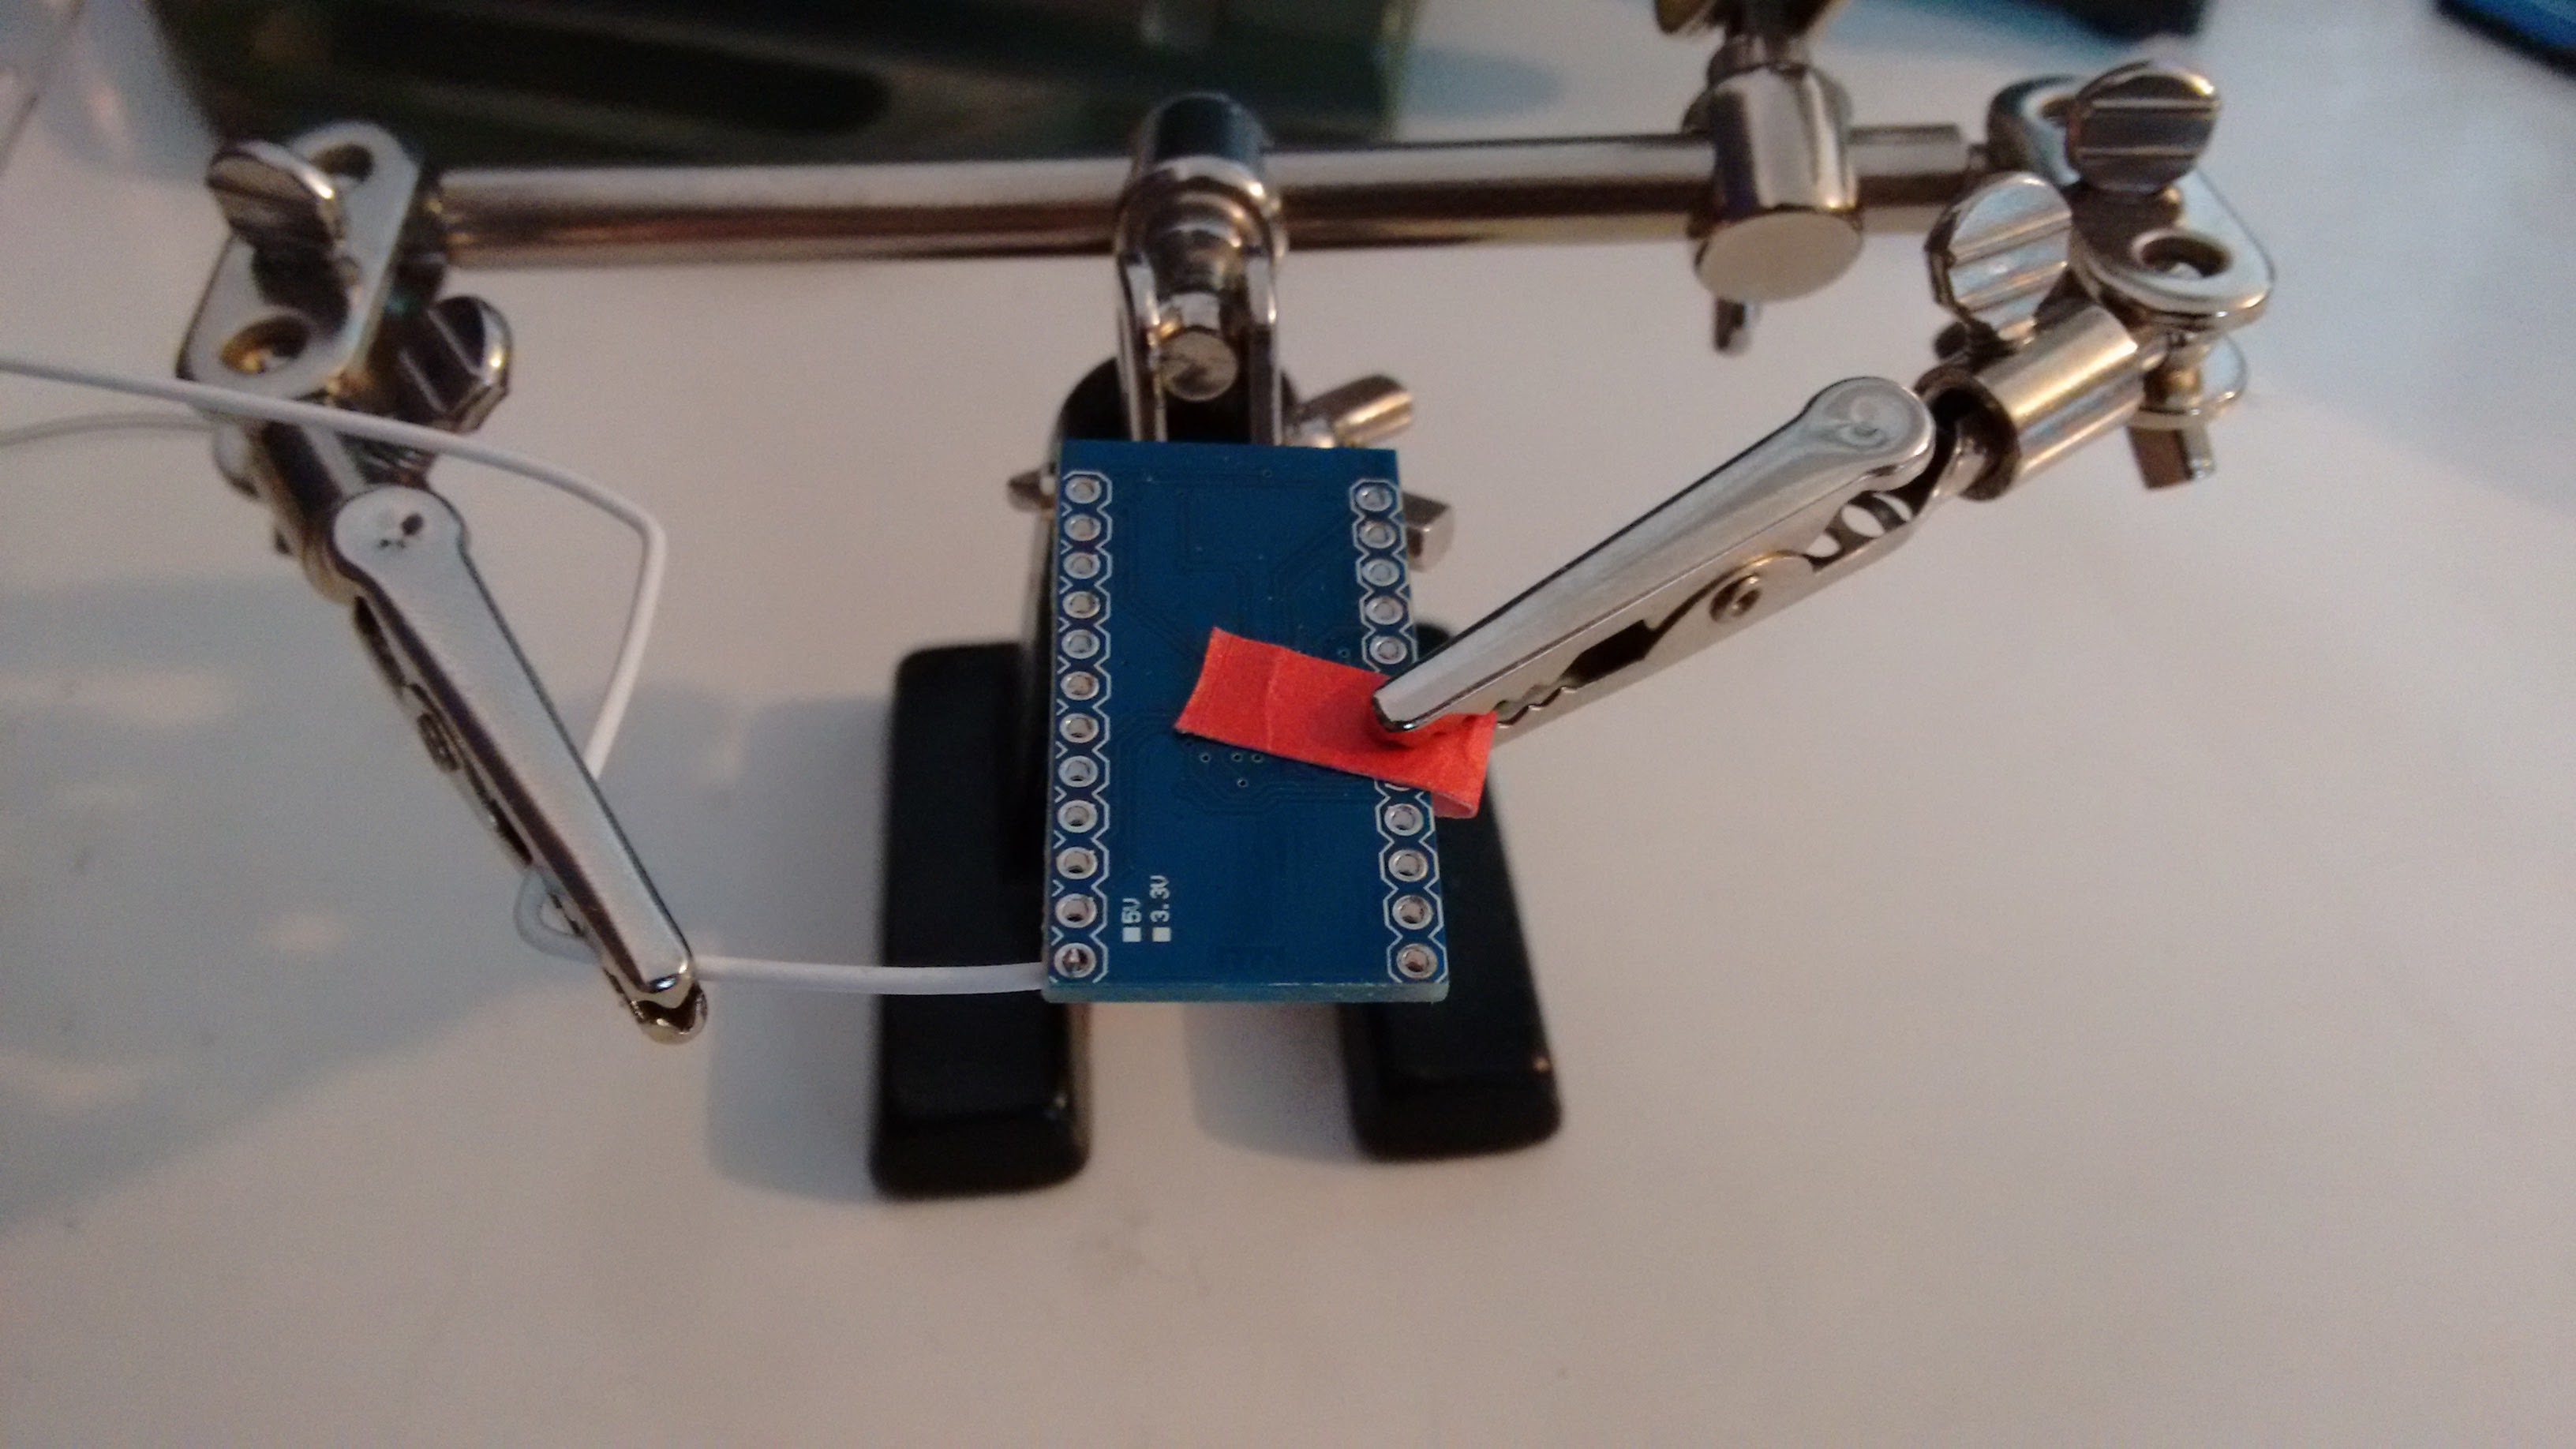 Little robot hands are very useful to keep your hands free for soldering. I'm not sure if this is the best way to hold sensitive electronics, but mine seem to be unhurt. Especially with the bit-of-paper.
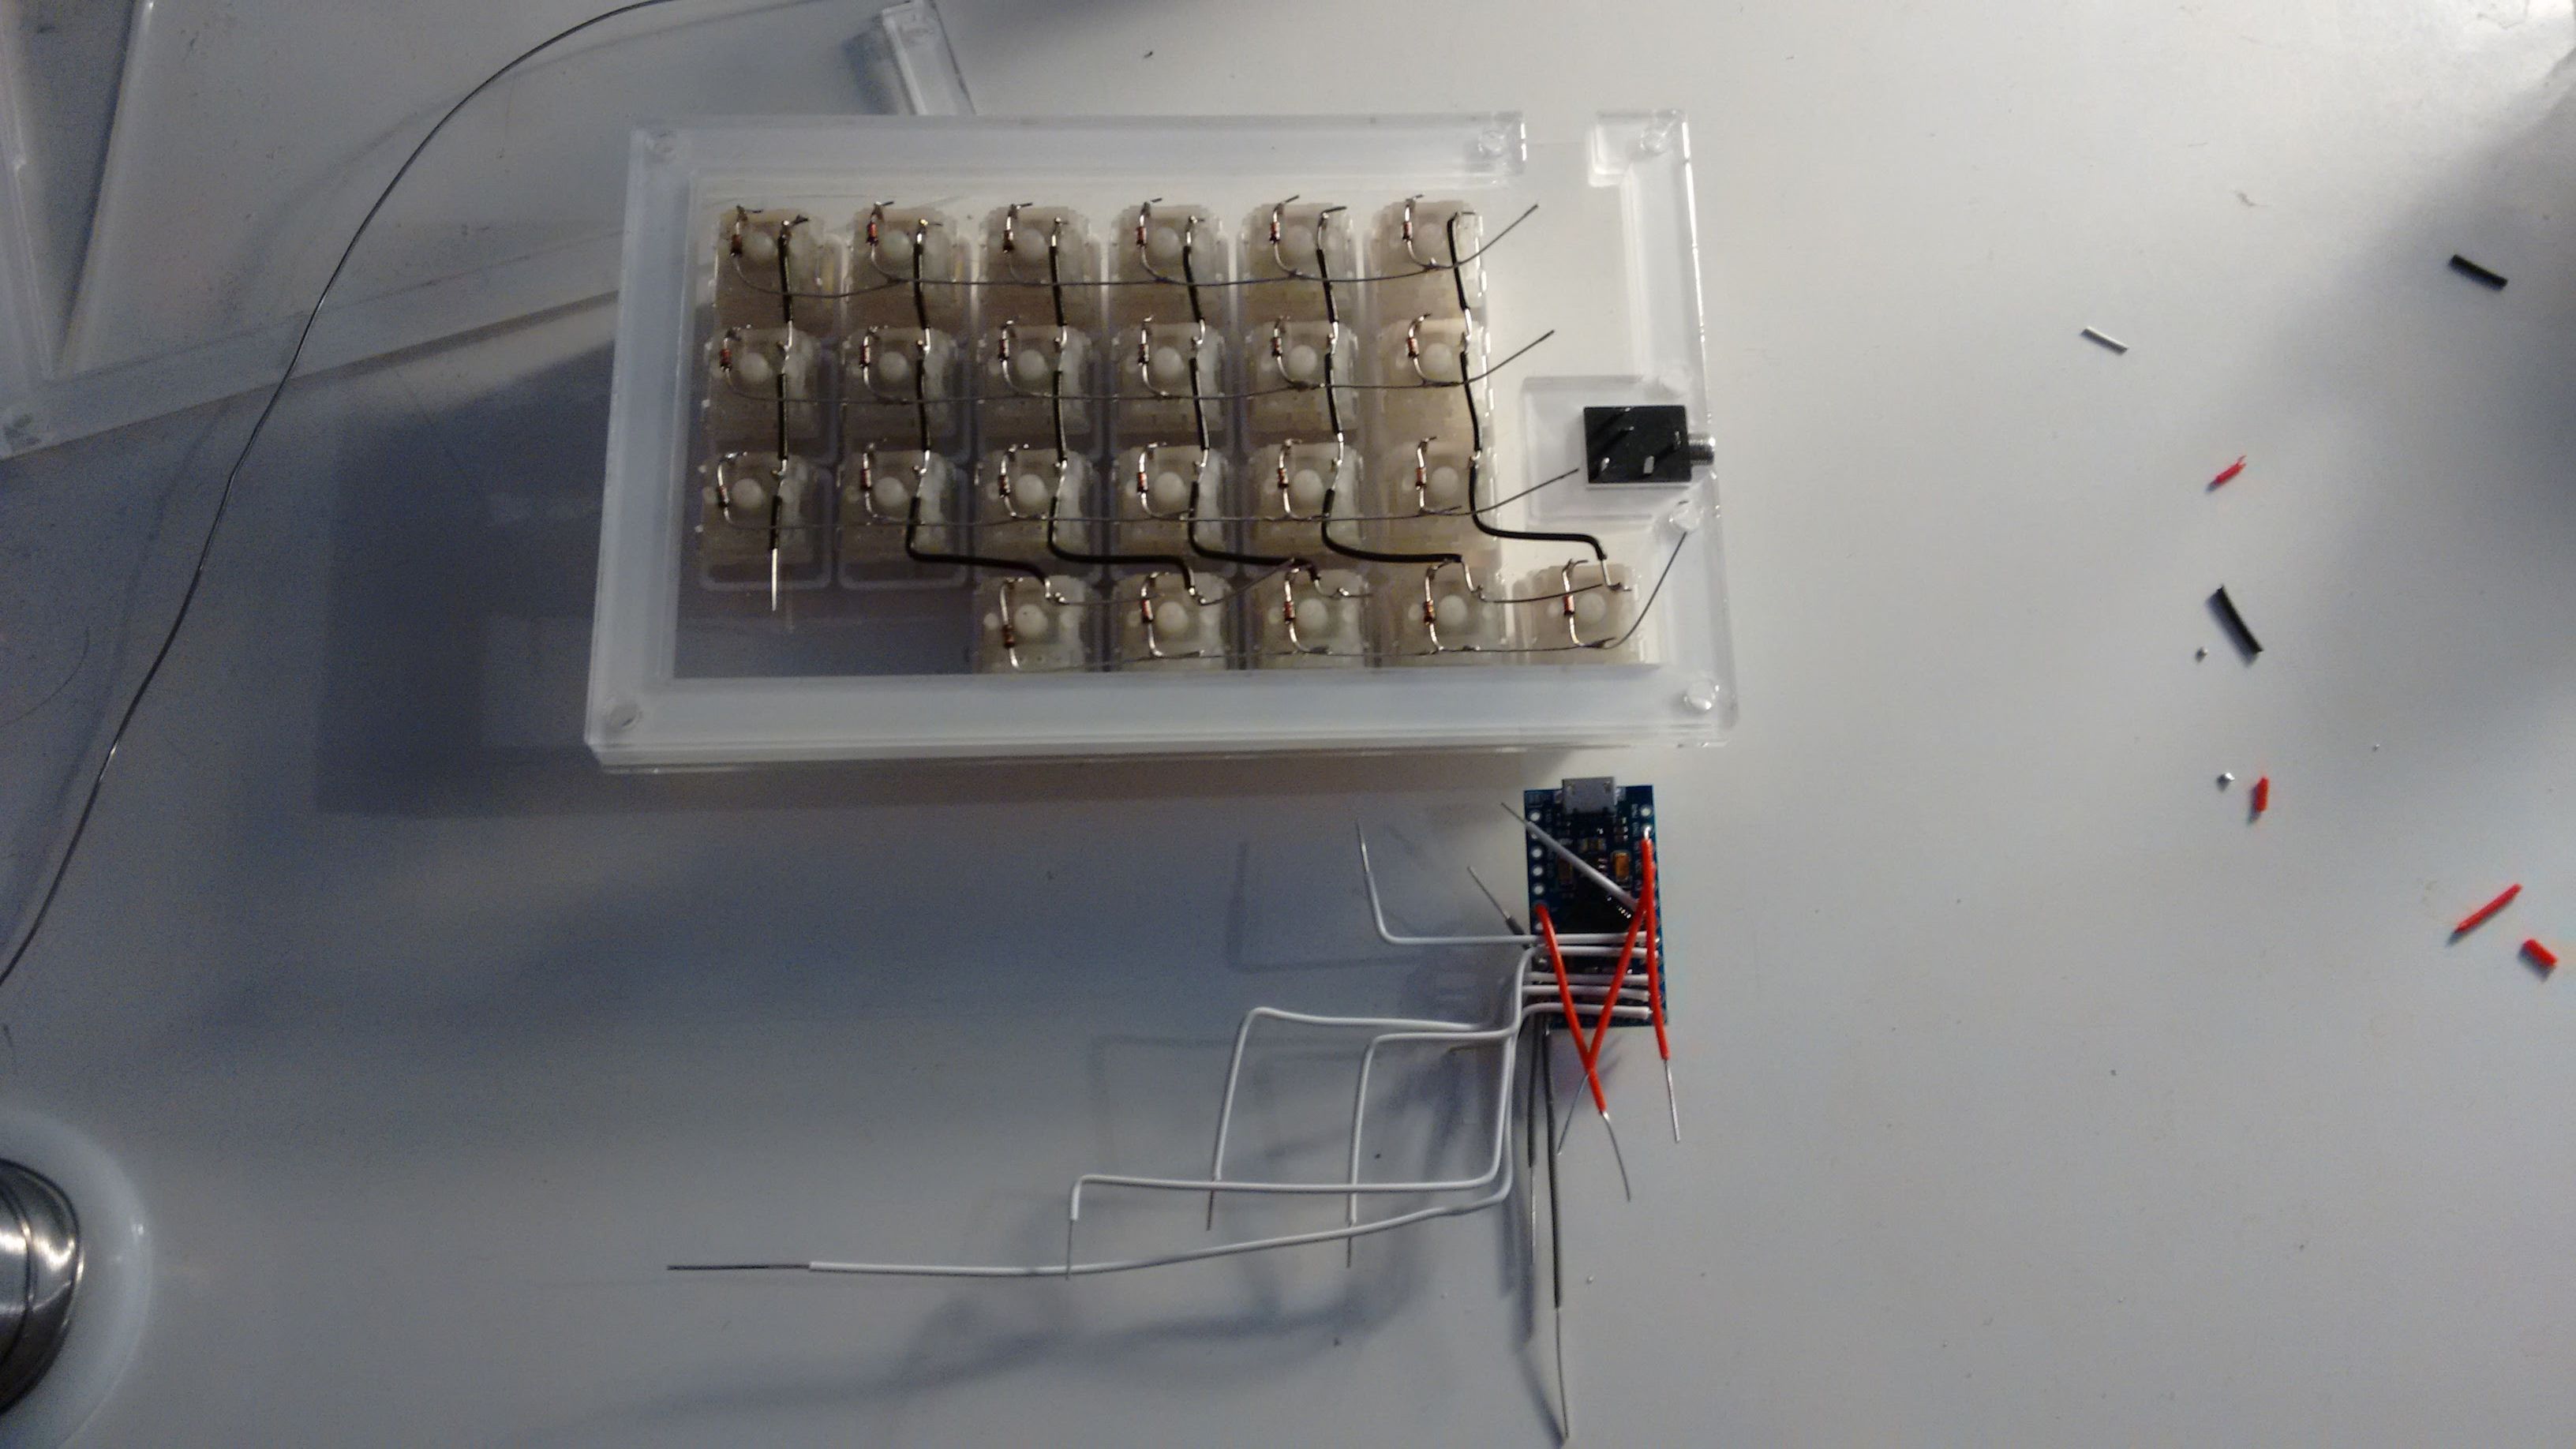 A pretty, spidery mess to connect the keys to the chip.
 All in place.
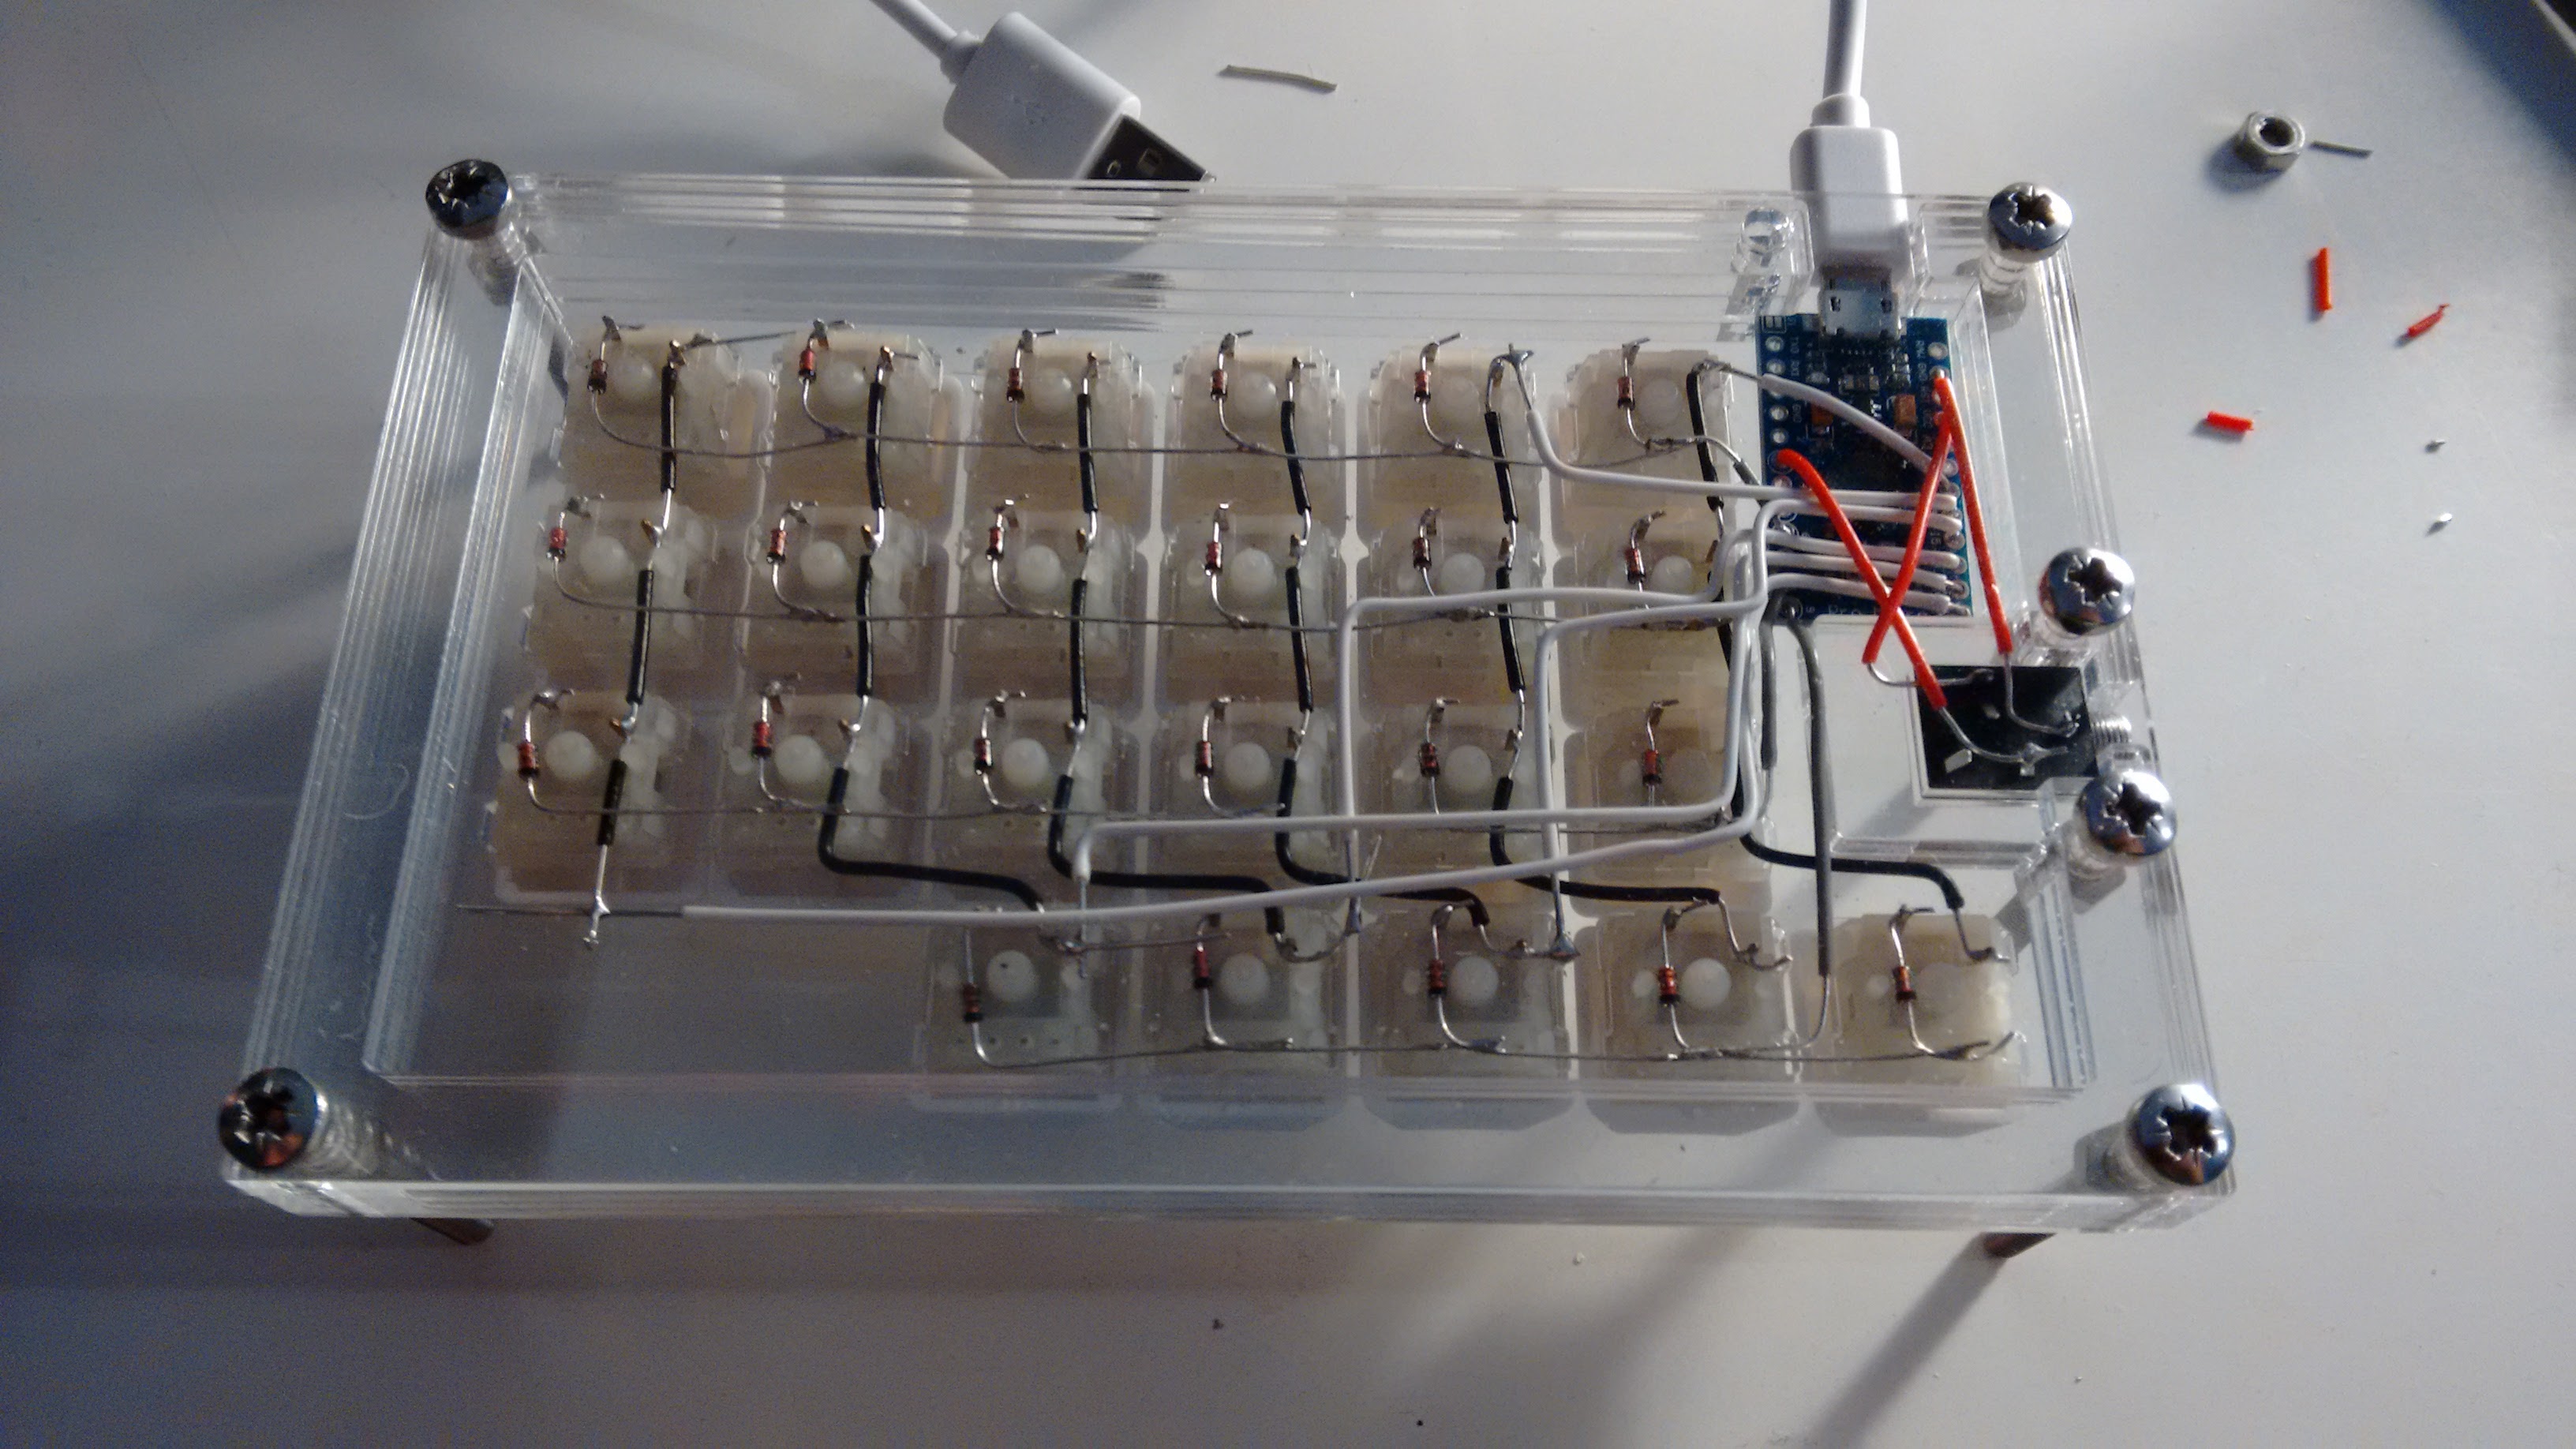
 The pretty, spidery mess was a bother, so instead I made some pretty, straight lines.
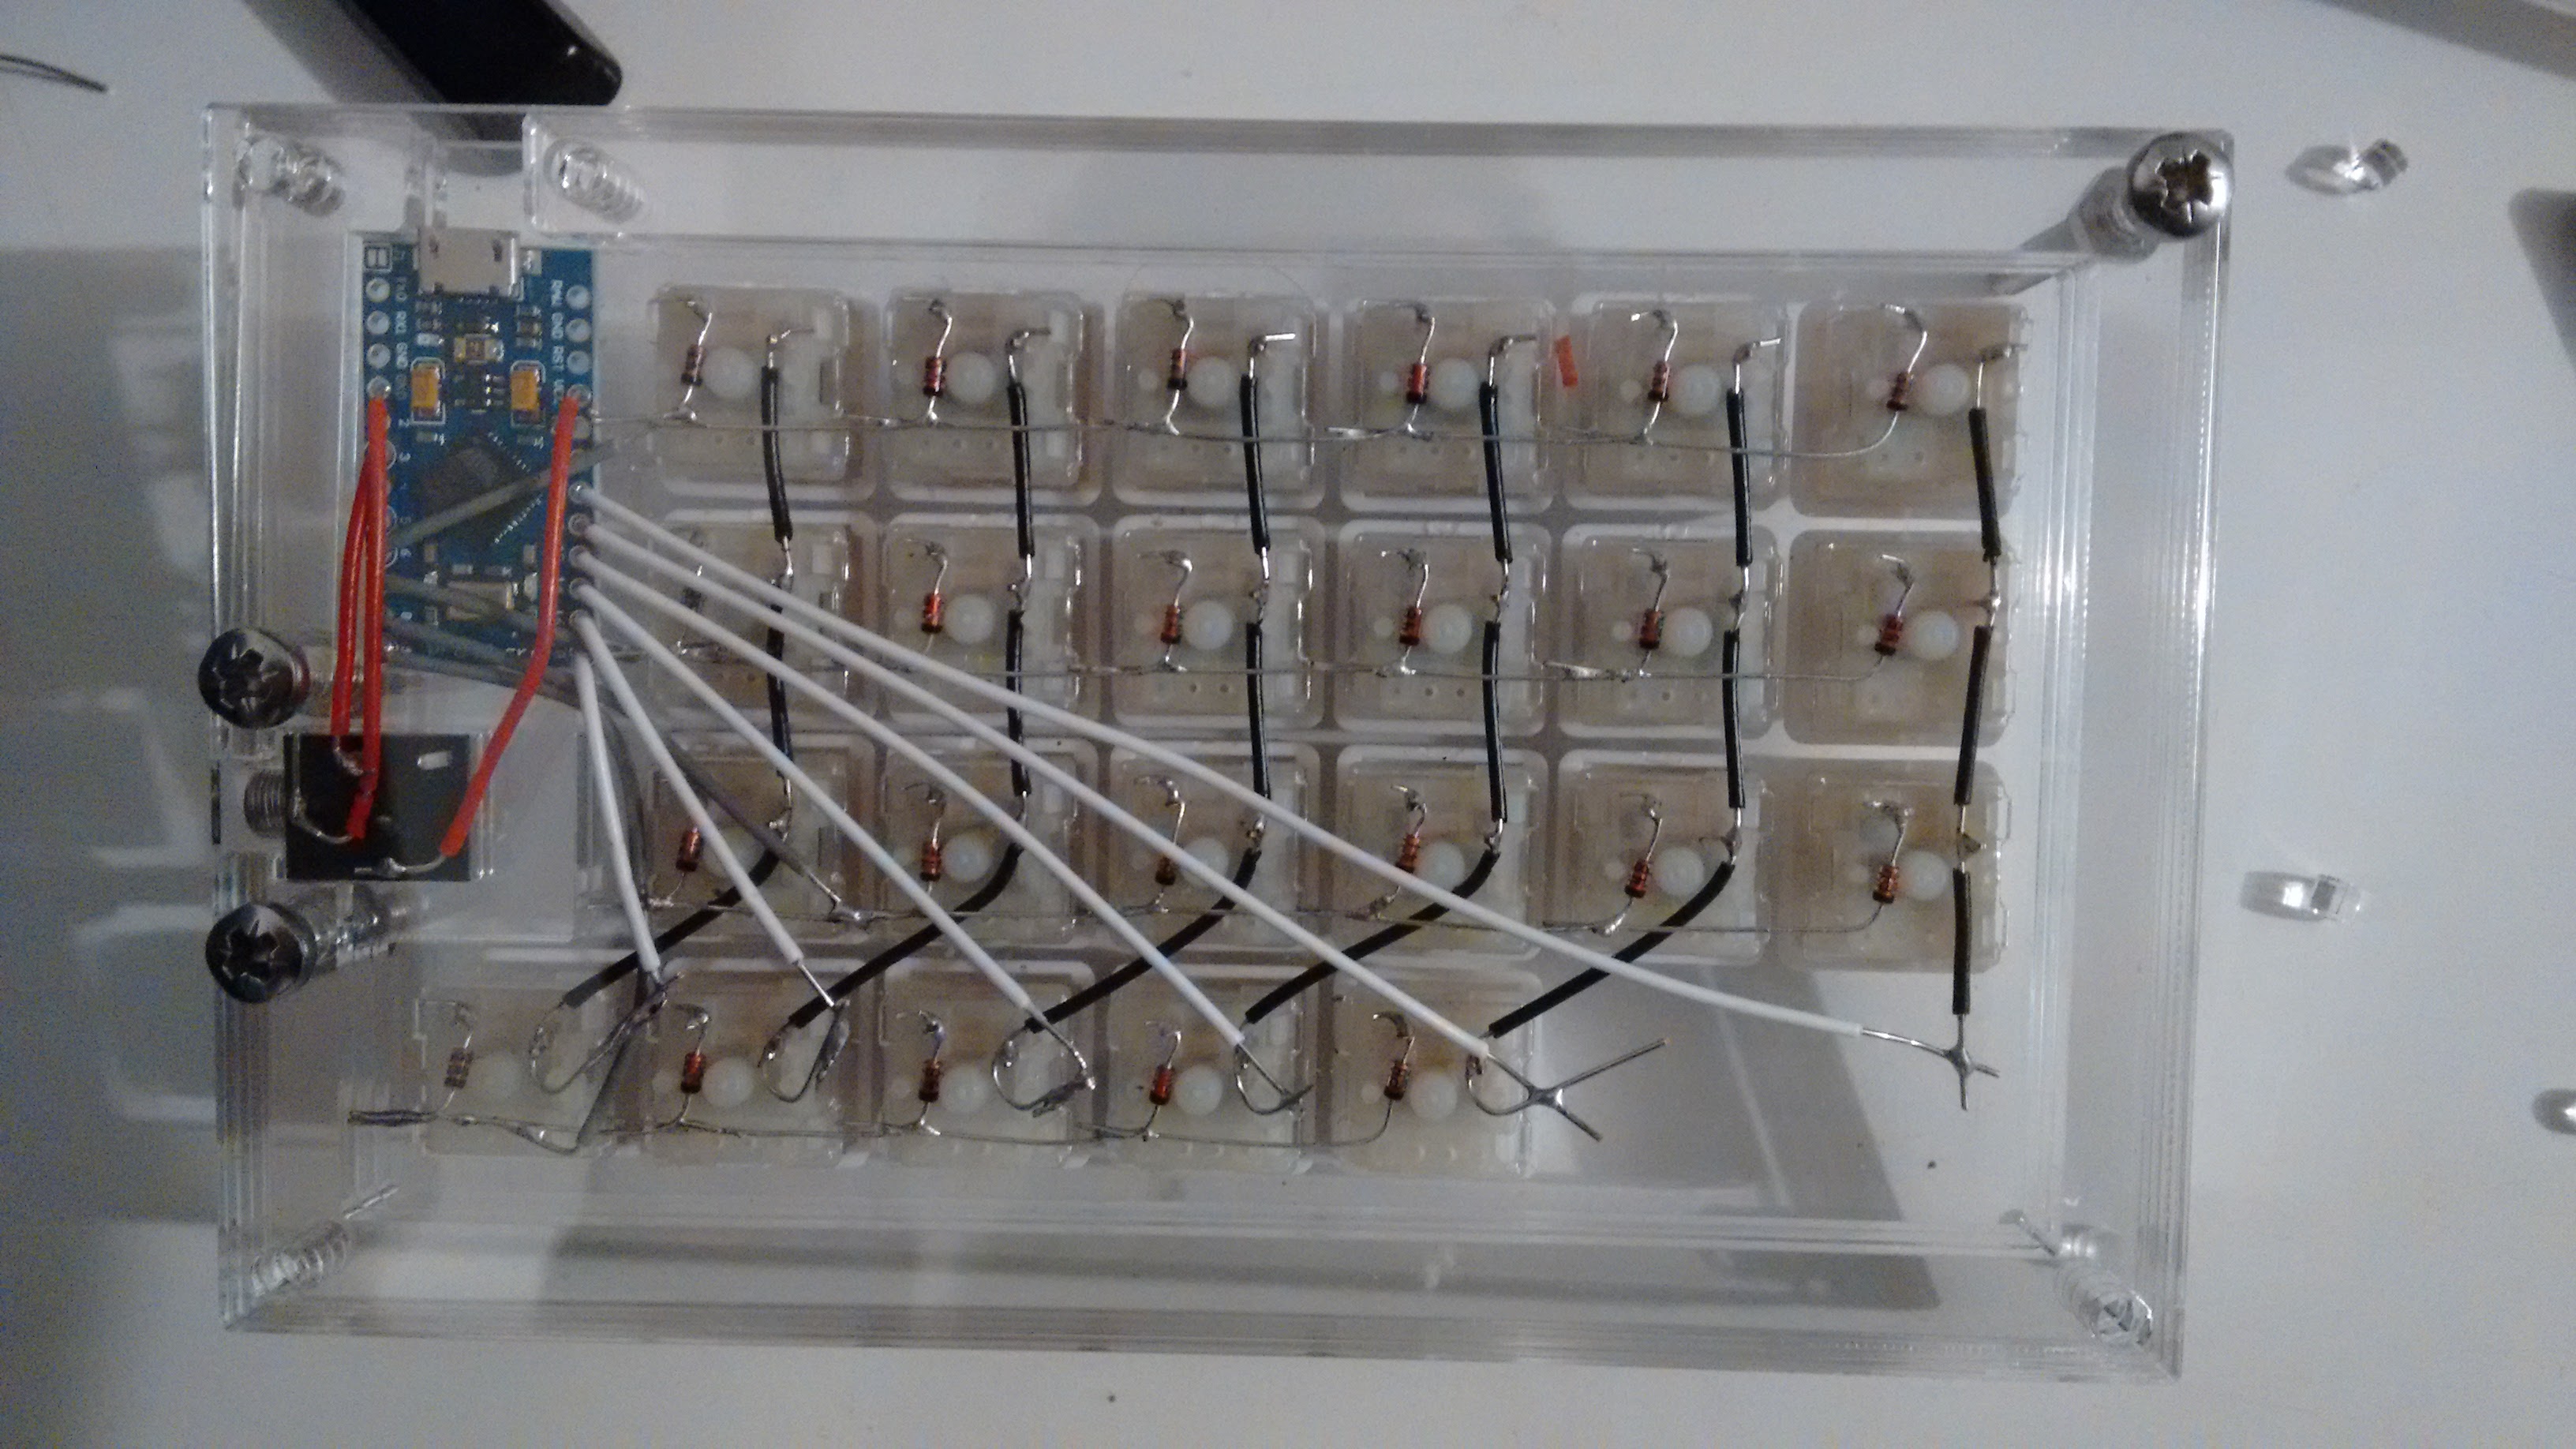
 This is what the right half looks like...
 ...and the left.
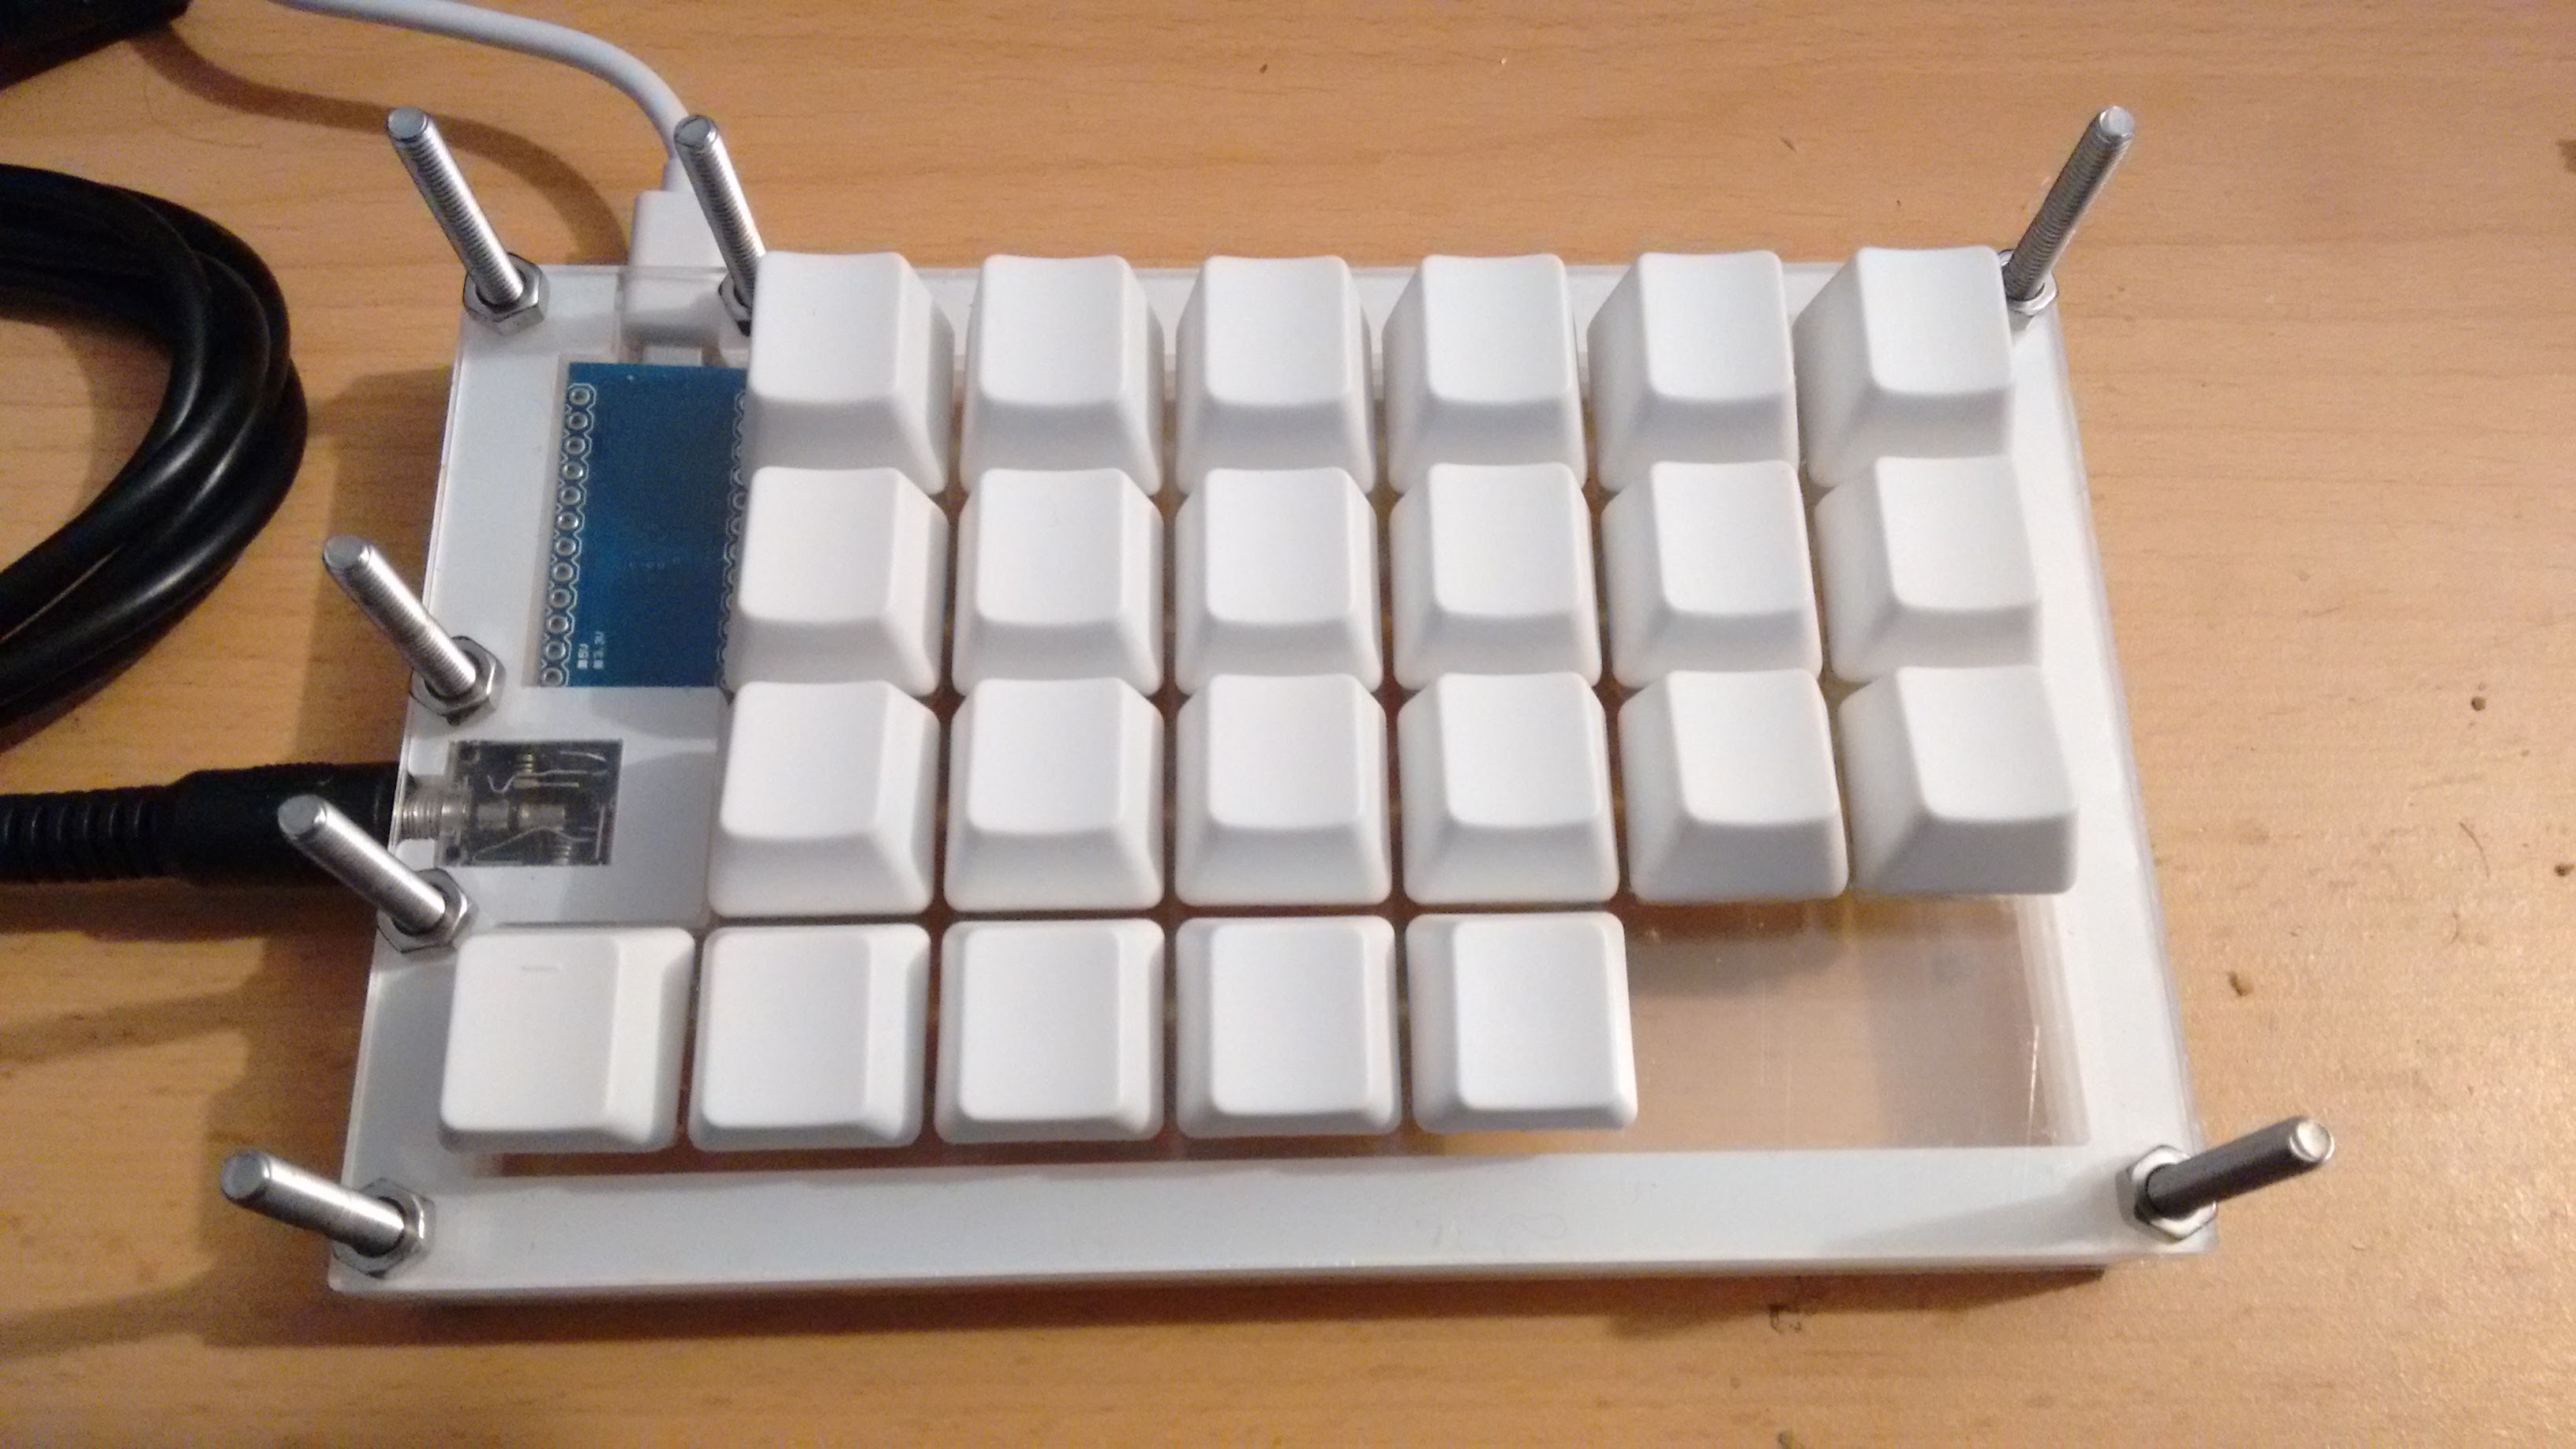
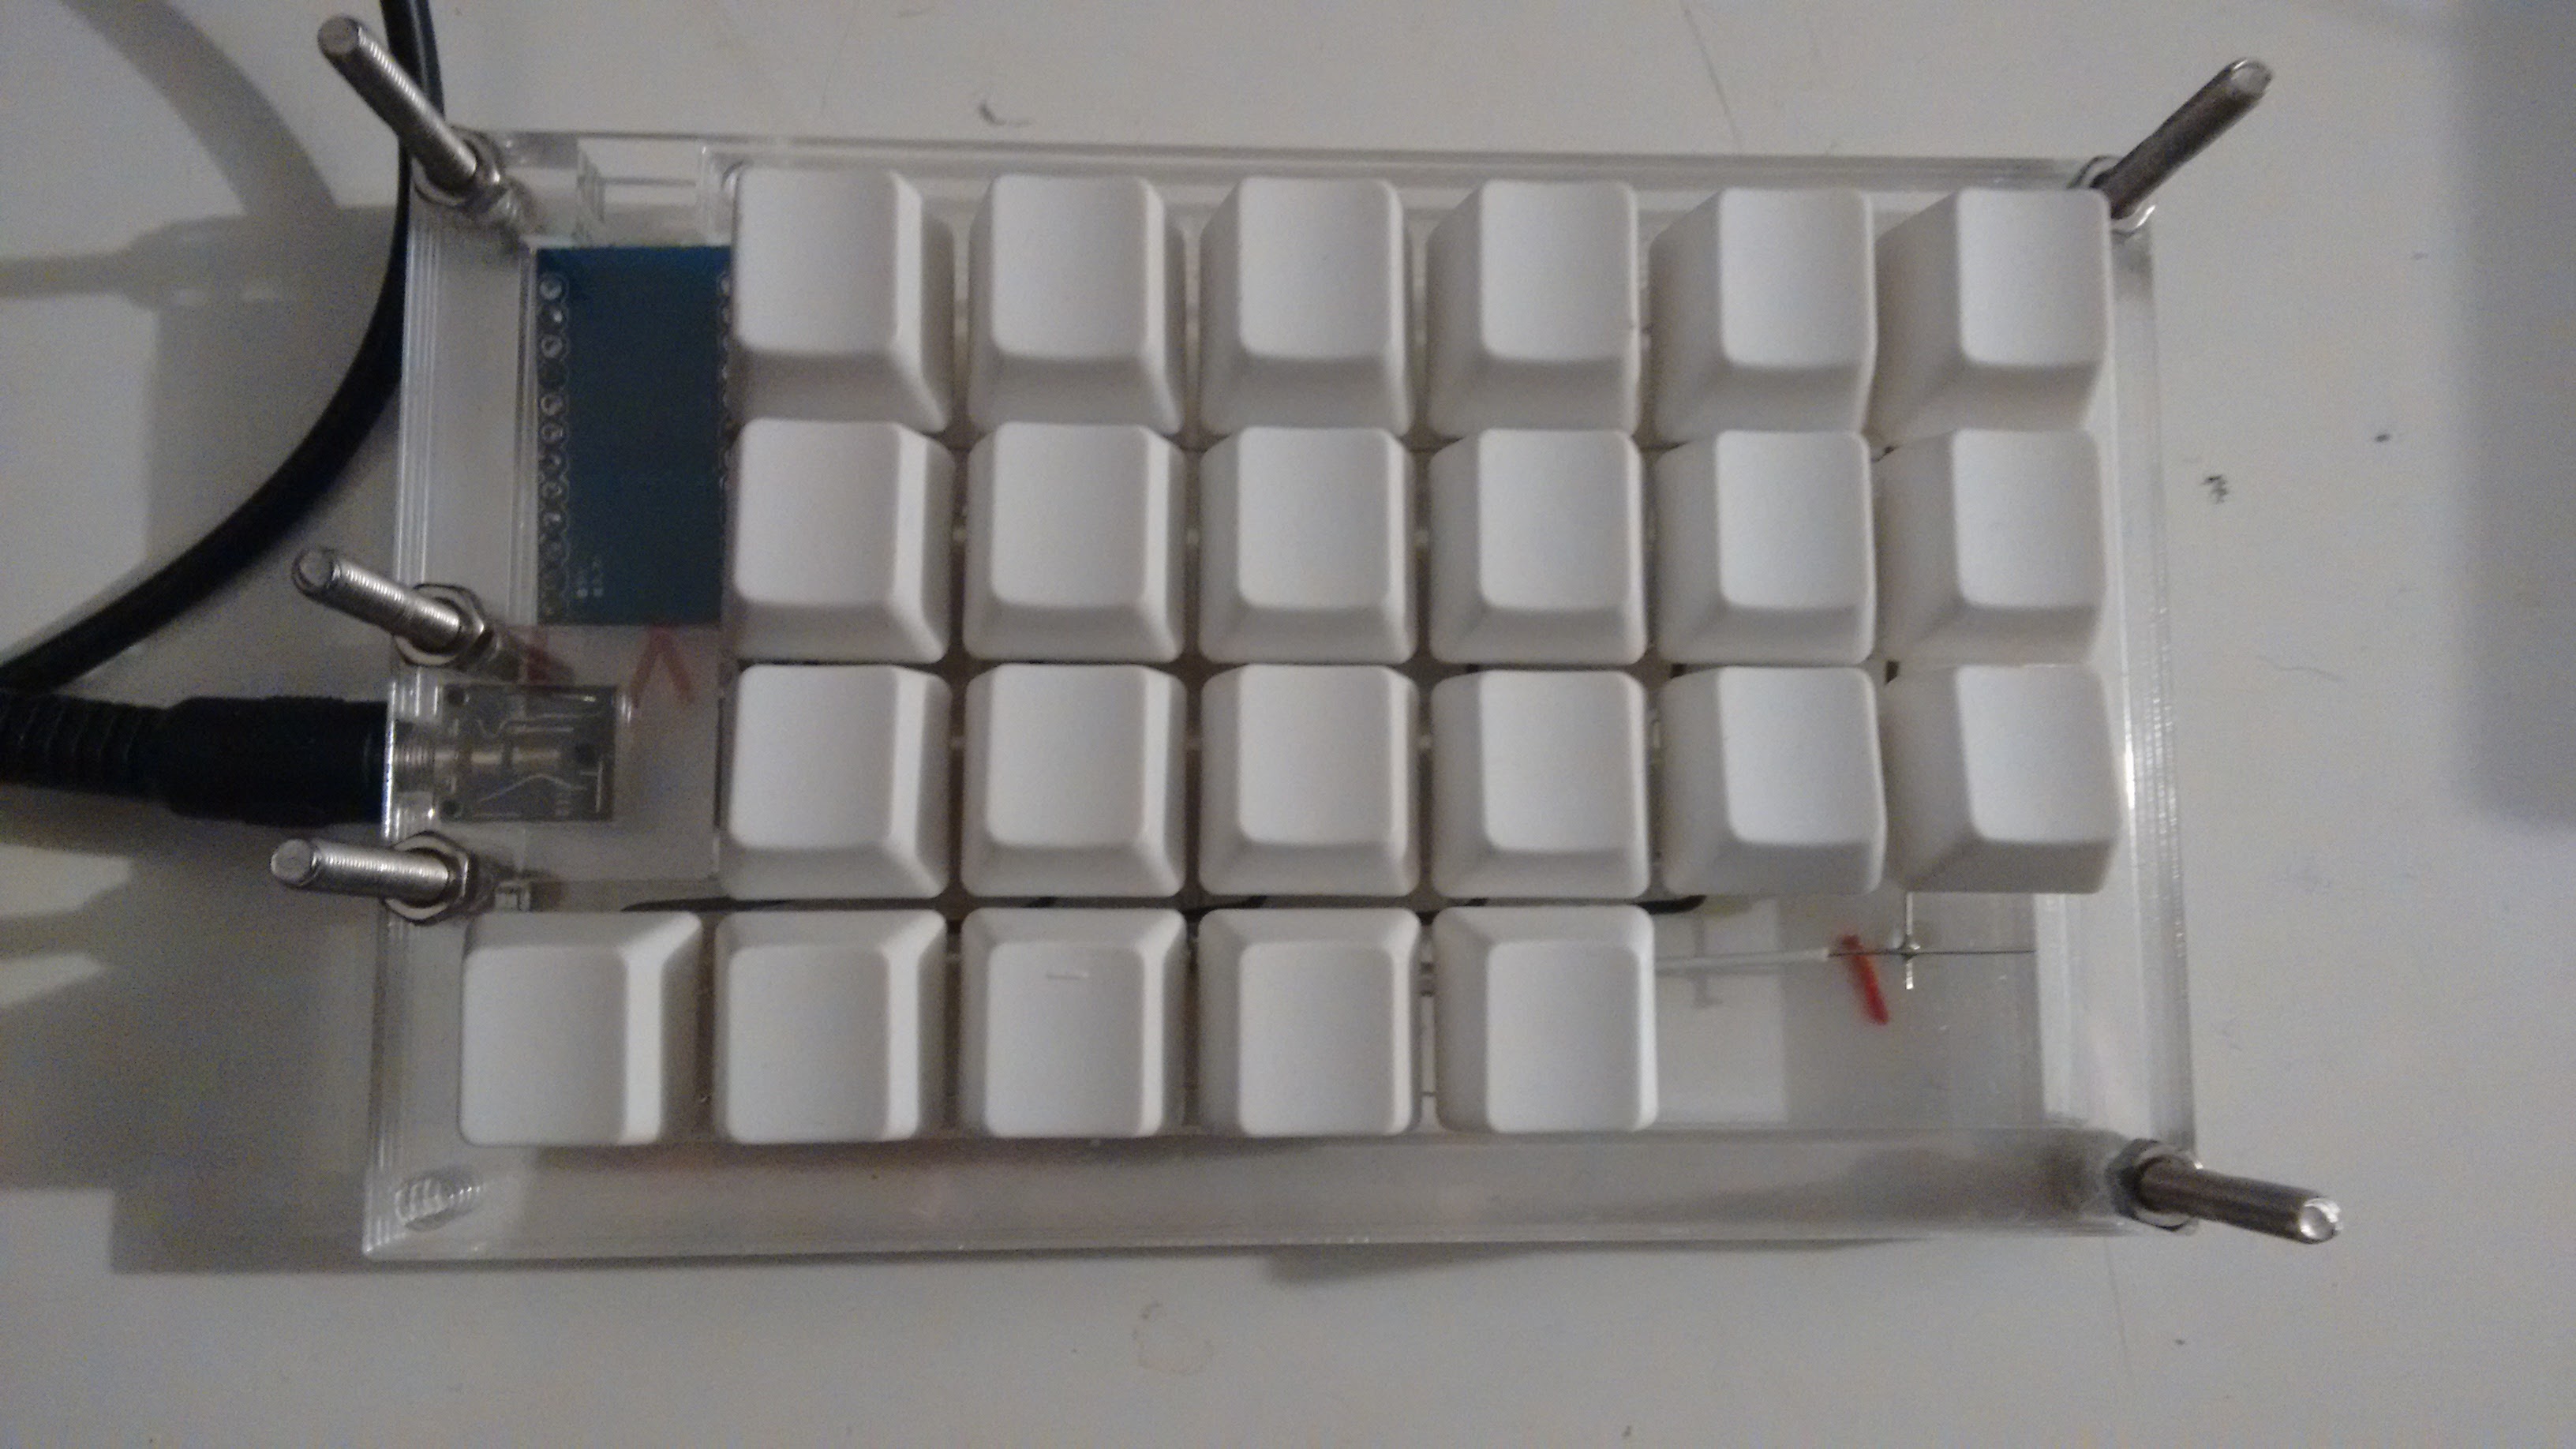
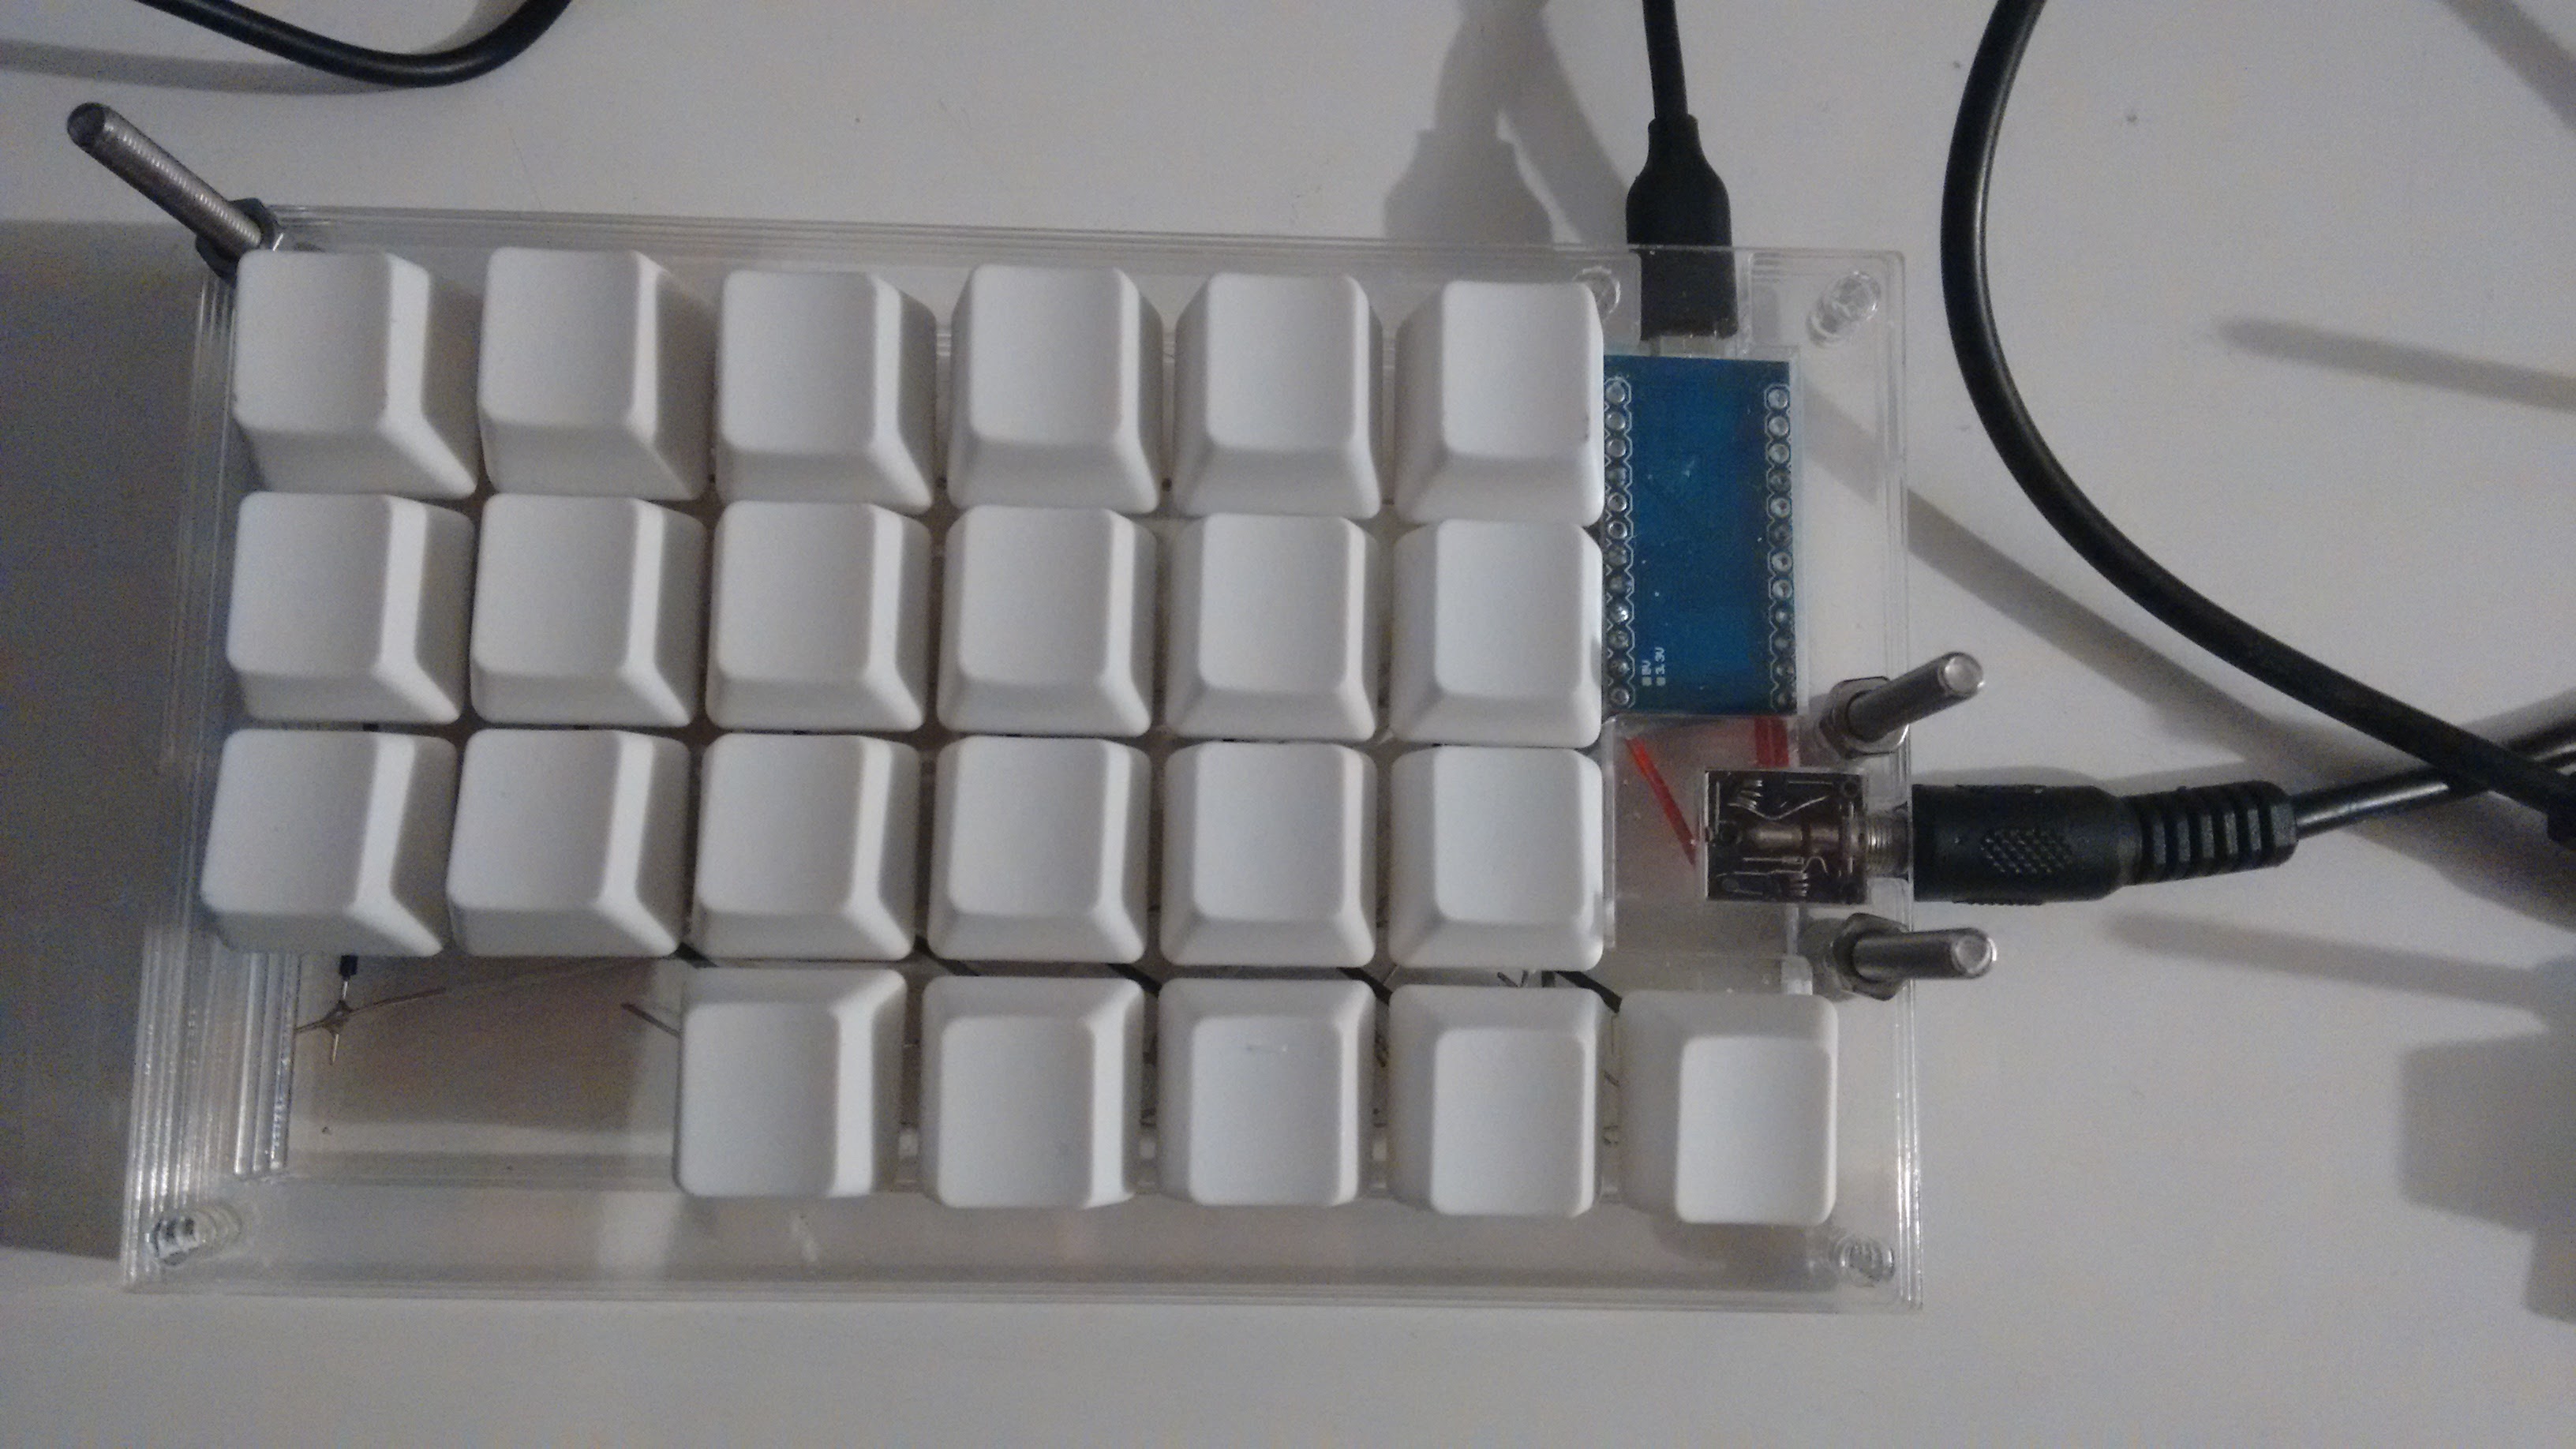
Complete!
Firmware
Next came adding the firmware to the chips. I suppose it would've been good to do this before all the soldering, in case one of 'em won't work and would have to be replaced. The soldering was quite fiddly. They did both work, though, and are now running Ahtn's split keyboard version of the TMK firmware. I added the layout, and then I had a working keyboard!
Thoughts
As mentioned in the beginning, the many thumb buttons are a bit tough to get used to. I'm typing this text on the new keyboard, but I changed the layout to one with a spacebar on each thumb that work as function keys when held. That is the focus of my next keyboard design, and it seems to work well so far.